
Google OAuth Setup Guide
Walkthrough
2:54Video Walkthrough (2:54)

If you have not downloaded your deployment variables file yet, this is a good time to do it.
Choose Azure or GCP below. In this platform, you can either enter variables manually, one card and one field at a time, or use bulk mode. In bulk mode, you fill this template as you go and later paste everything into one textarea, and the platform will sort and validate the variables for you.
If you prefer, you can also copy the templates directly from the Azure bulk format page or the GCP bulk format page.
Deployment target
Before you start
This tutorial will guide you through creating the necessary credentials to allow users to sign in to your application with their Google account.
Before you start, you'll need to be authenticated in the Google Cloud Console and agree to the terms of service.
Create a Project & Configure the OAuth Consent Screen
STEP 01- Open the main menu in the top-left corner, navigate to "APIs & Services", and select "OAuth consent screen".
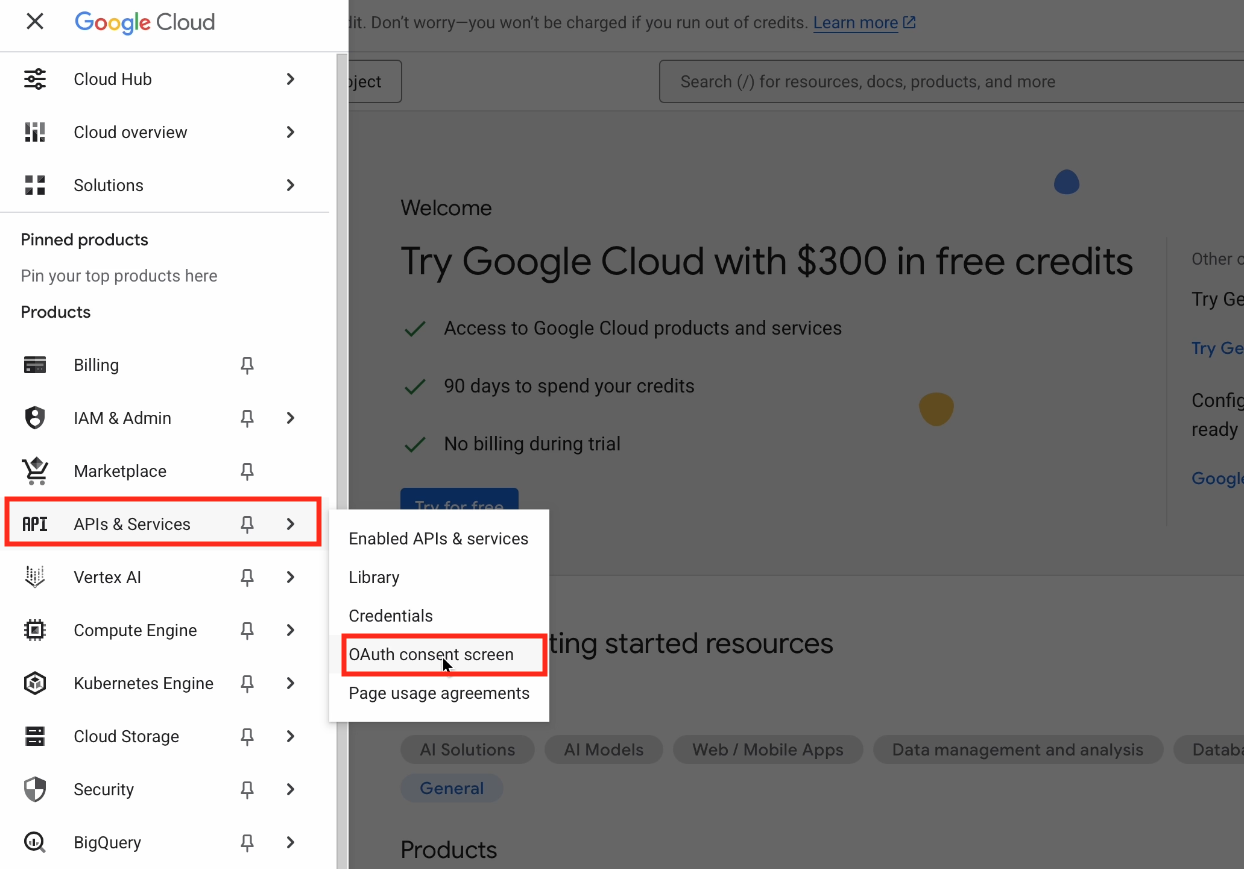
Google Cloud Console navigation menu with 'APIs & Services' expanded and 'OAuth consent screen' highlightedClick to enlarge ↗ - In the top-right corner of the Overview section, click the "Create Project" button.
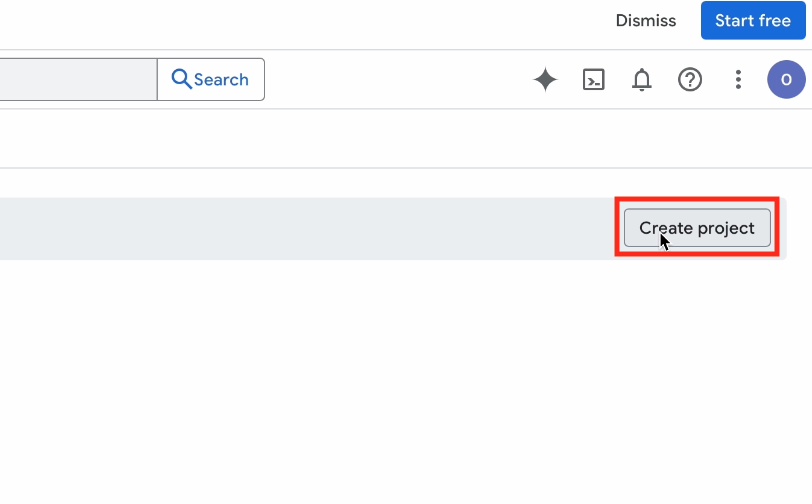
Google Cloud Console showing the 'Create Project' button in the top-right cornerClick to enlarge ↗ - In the project creation form:
- Enter a project name
- You can leave the Location field as is (No organization)
- Click "Create"
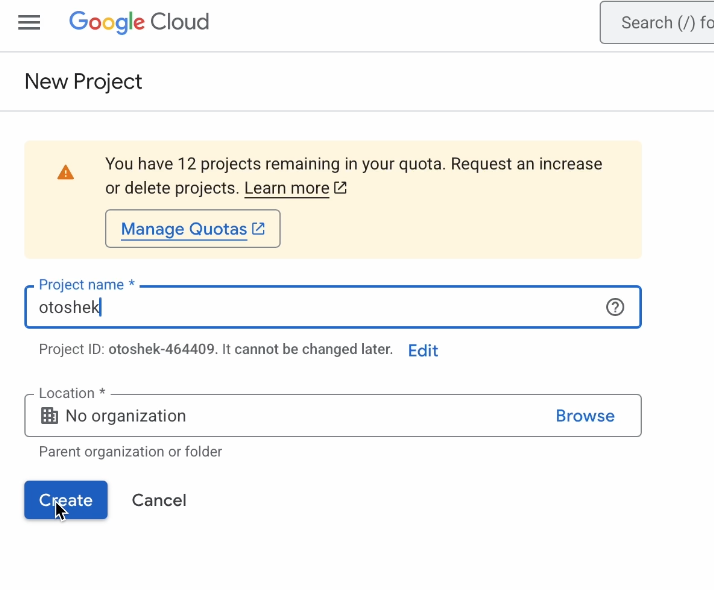
Google Cloud Console project creation form showing the project name field and location selectorClick to enlarge ↗ - On the next page, click the "Get started" button in the middle of the page.
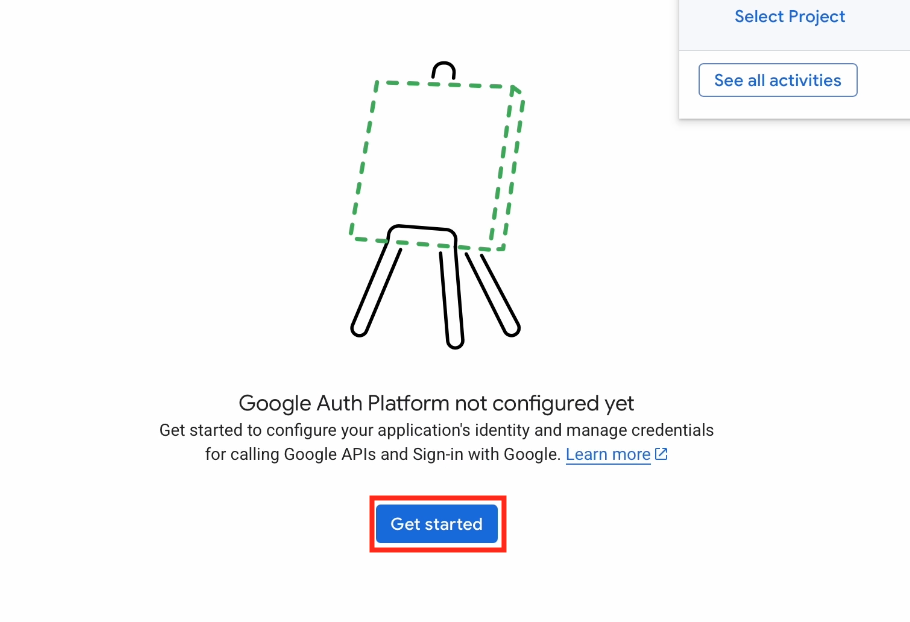
OAuth consent screen showing the 'Get started' button in the centerClick to enlarge ↗ - You'll now configure the OAuth consent screen in 4 steps:
1. App information
- App name: The name of your application that users will see
- User support email: An email for users to contact you with questions
- Click "Next" to continue
2. Audience
- Select "External" user type for your audience
- Click "Next" to continue
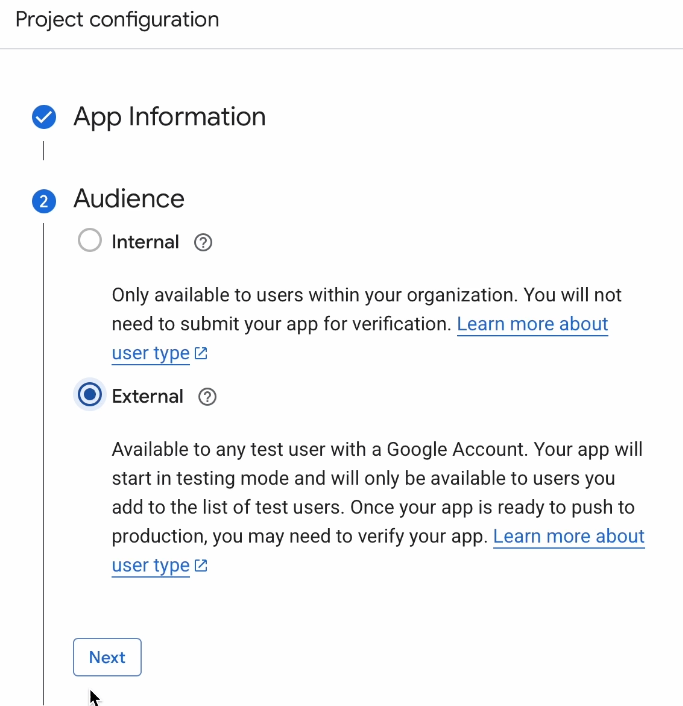
OAuth consent screen configuration showing the 'Audience' section with 'External' user type selectedClick to enlarge ↗ 3. Contact information
- Enter your developer contact information
- Click "Next" to continue
4. Finish
- Check the box: "I agree to the Google API Services: User Data Policy"
- Click "Continue", then click "Create" to complete the setup
Create and Configure OAuth Client
STEP 02- In the Google Cloud Console, select your project.
- In the left sidebar, navigate to APIs & Services > Credentials.
- Click the "+ CREATE CREDENTIALS" button at the top of the page, then select OAuth client ID.
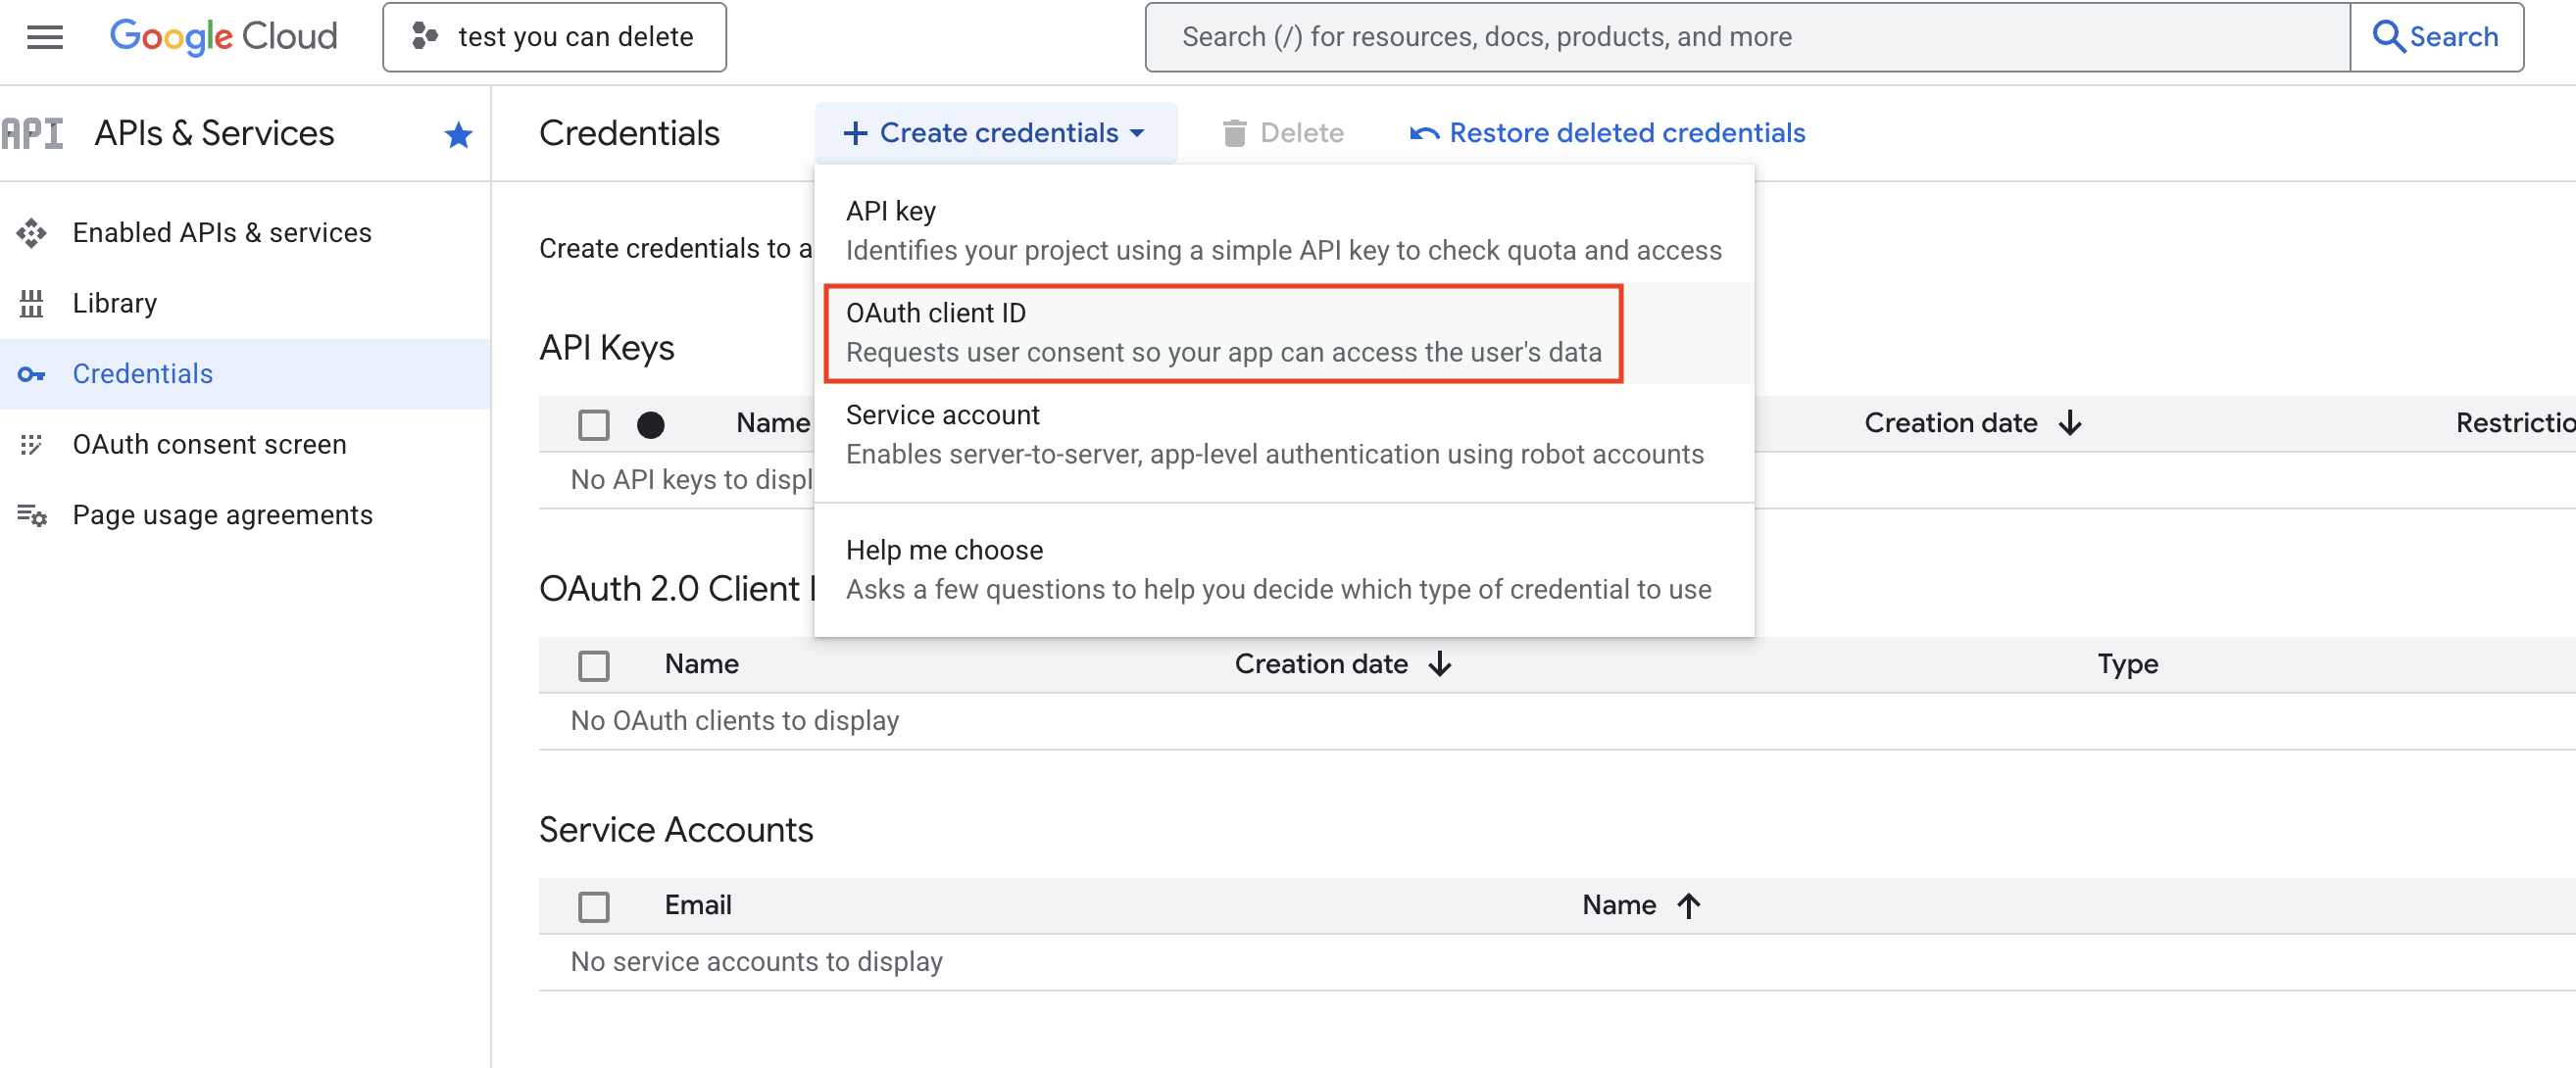
Google Cloud Console showing the 'Create Credentials' dropdown menu with 'OAuth client ID' selectedClick to enlarge ↗ - In the Application type dropdown menu, select Web application.
- In the Name field, enter a name for your OAuth client (e.g., "Otoshek Web App").
-
Configure Origins and Redirect URIs
This is a critical security step. These URLs tell Google which domains are allowed to make authentication requests and where to send users back after a successful login.
- Under "Authorized JavaScript origins", add the URLs from where your application will make requests. Add the localhost URL below for local development, and your production URL once your app is deployed.URL
https://localhost:5173Your production URL (e.g.
https://otoshek-saas-1234.azurewebsites.net) will be available after deployment. - Under "Authorized redirect URIs", add the specific callback URLs. These must correspond to your origins and include the exact callback path. Add the localhost URL below for local development, and your production callback URL once deployed.URL
https://localhost:5173/accounts/google/login/callback/Your production redirect URI (e.g.
https://otoshek-saas-1234.azurewebsites.net/accounts/google/login/callback/) will be added during deployment.
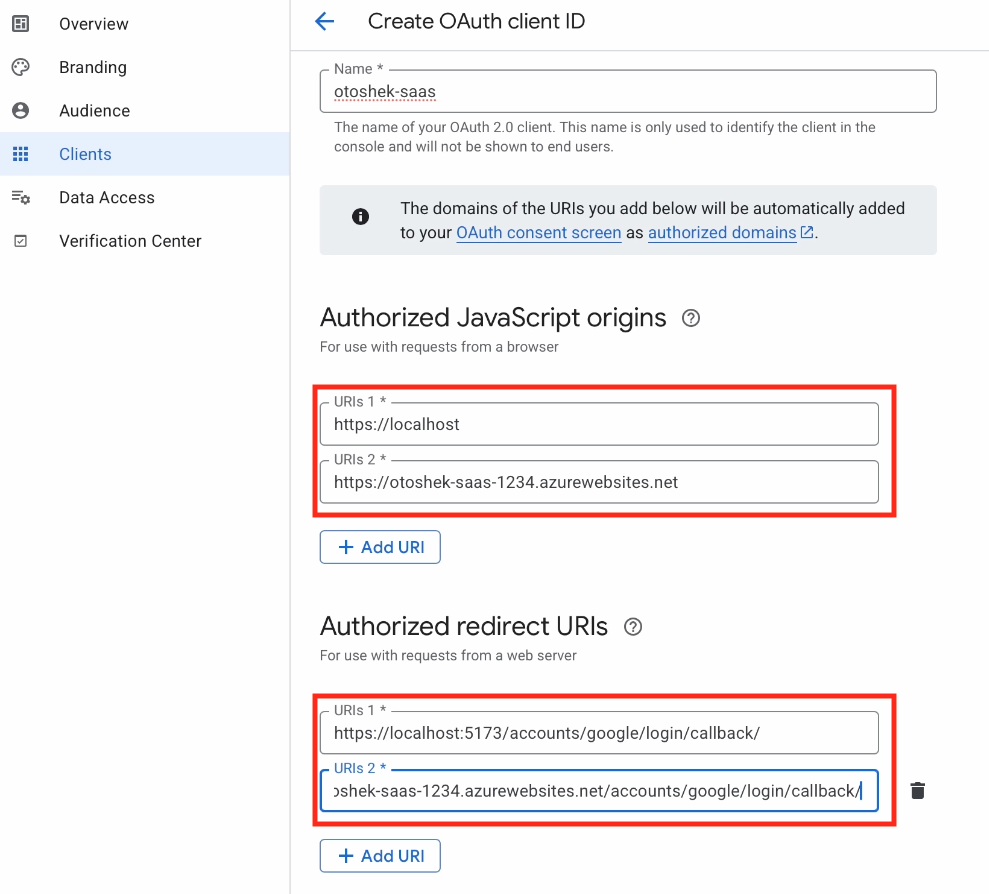
OAuth client configuration with the origin and redirect URIs filled outClick to enlarge ↗ Once you have set your URLs, click "Create".
- Under "Authorized JavaScript origins", add the URLs from where your application will make requests. Add the localhost URL below for local development, and your production URL once your app is deployed.
🎉 Credentials ready
HANDOFFYour Google OAuth Credentials
Store these values securely in your project's environment variables.
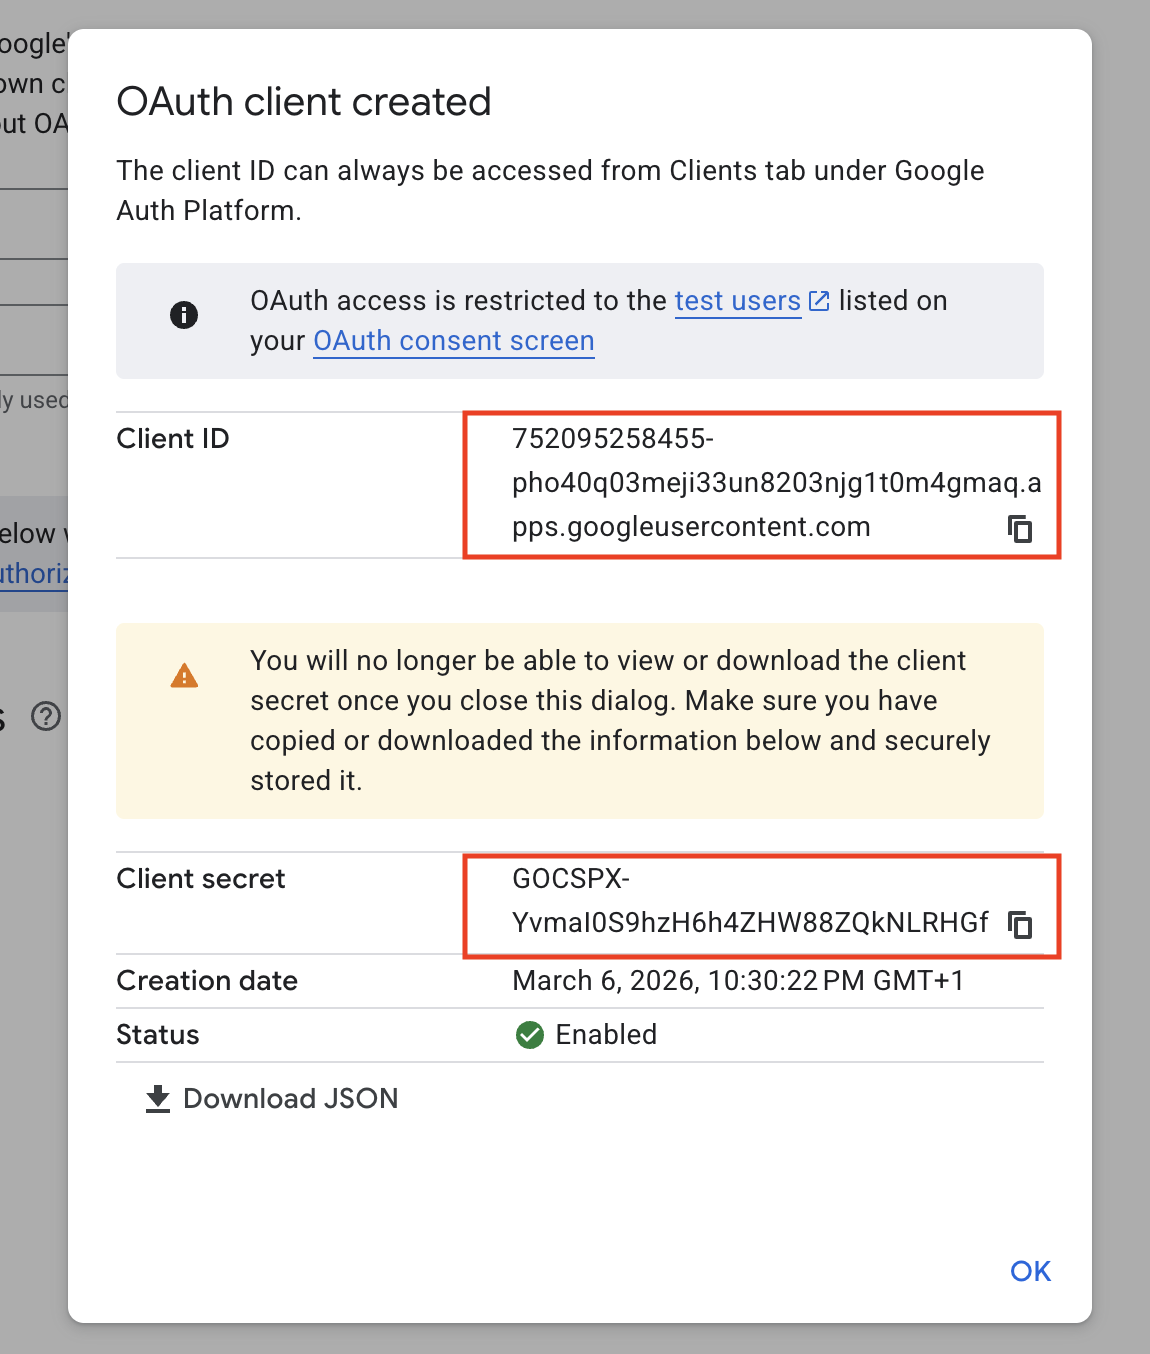
GOOGLE_CLIENT_ID=<Your Client ID>GOOGLE_CLIENT_SECRET=<Your Client Secret>