
Stripe Setup Guide
This guide will walk you through getting the essential credentials from Stripe to handle payments and subscriptions in your application.
Walkthrough
0:43Video Walkthrough (0:43)

If you have not downloaded your deployment variables file yet, this is a good time to do it.
Choose Azure or GCP below. In this platform, you can either enter variables manually, one card and one field at a time, or use bulk mode. In bulk mode, you fill this template as you go and later paste everything into one textarea, and the platform will sort and validate the variables for you.
If you prefer, you can also copy the templates directly from the Azure bulk format page or the GCP bulk format page.
Deployment target
Sign in & open a sandbox
First, you'll need to sign in to your Stripe account or sign up if you don't have one yet. You can do this at stripe.com.
Once logged in, you'll need to access a sandbox environment—a secure testing space where you can explore features without processing real payments. The process differs slightly between new and existing Stripe accounts.
For new Stripe users
If you just signed up with Stripe, a window will appear giving you the option to click on "Go to sandbox" or "Go to my live account now". Choose "Go to sandbox".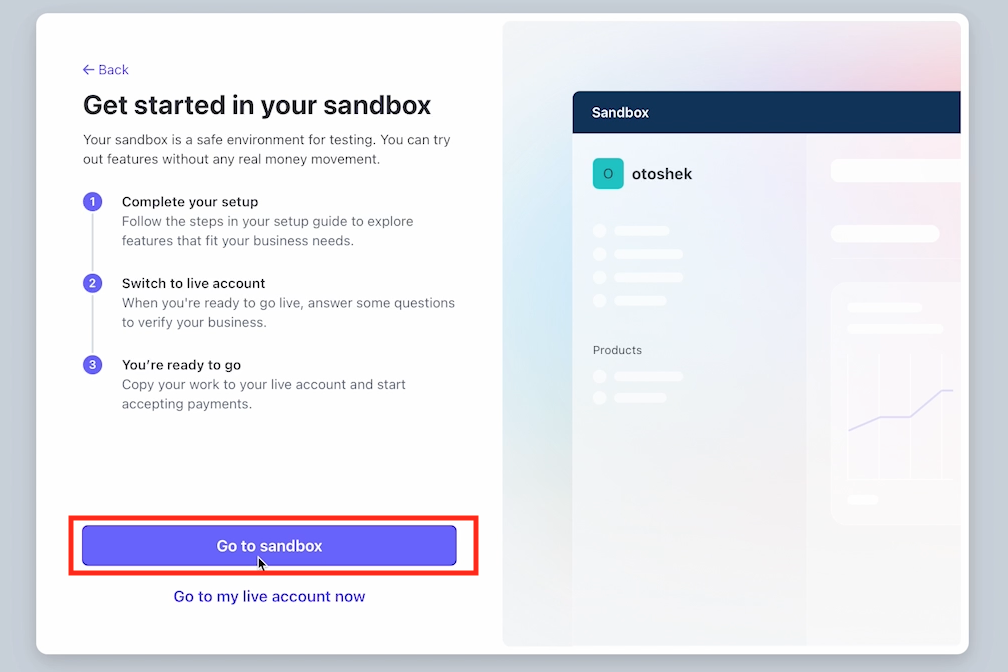
Fig. 1.1 · Stripe welcome screen with 'Go to sandbox' optionClick to enlarge ↗ For existing Stripe users
Existing Stripe users can access the sandbox environment by clicking their username in the top-right corner and selecting '+ Create sandbox' from the dropdown menu.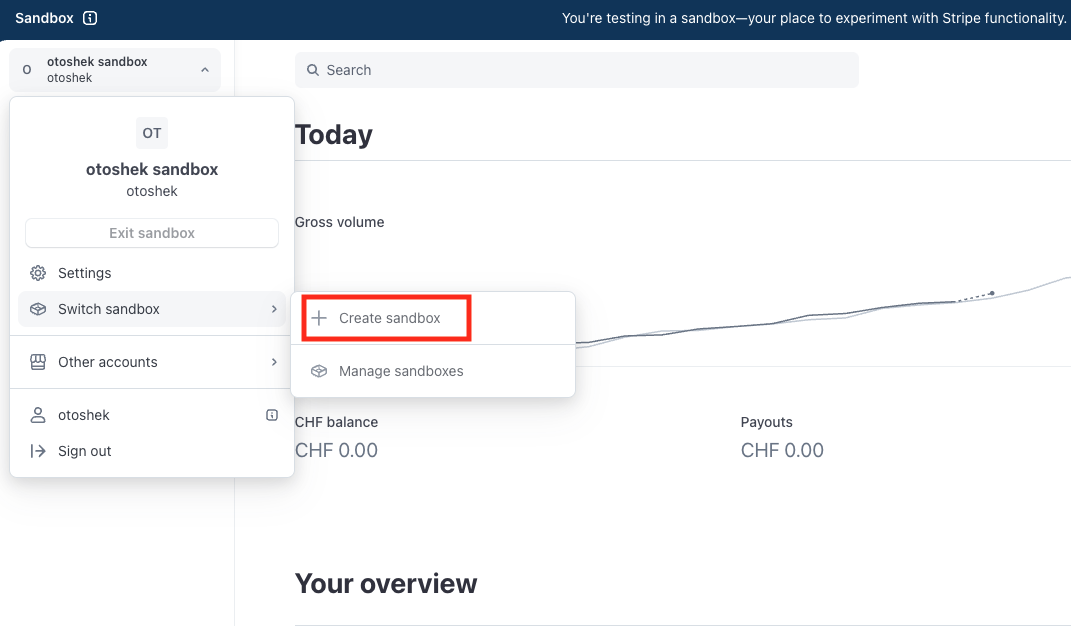
Fig. 1.2 · Stripe dashboard with username dropdown and 'Create sandbox' optionClick to enlarge ↗
Get Your API Keys
STEP 01- On your Stripe Dashboard home page, locate the API keys section on the right side of the page.
- You only need the Secret key. Click on the secret key to automatically copy it, then store the value securely.
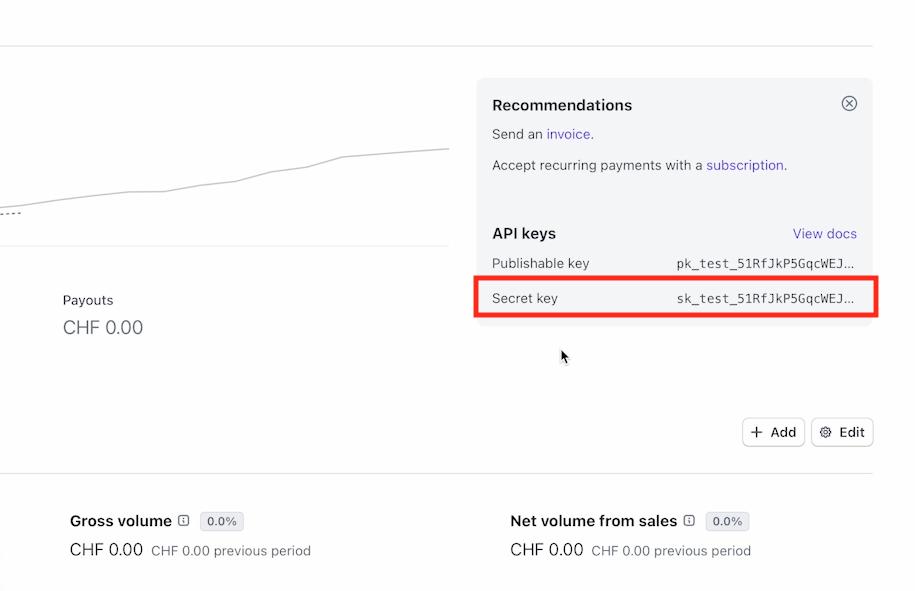
Fig. 1.3 · Stripe dashboard showing API keys sectionClick to enlarge ↗
🎉 Credentials ready
HANDOFFYour Stripe Credentials
Store these values securely in your project's environment variables.
STRIPE_SECRET_KEY=<Your Secret Key>
Webhook setup
Manual webhook walkthrough
OPTIONALA webhook is essential for a subscription-based service. It allows Stripe to send real-time notifications (events) to your application when important things happen, like a successful payment or a failed charge. The webhook signing secret we will get is used to verify that these incoming requests are genuinely from Stripe.
- In the search bar at the top of the page, type "webhook" and select Webhooks from the suggestions.
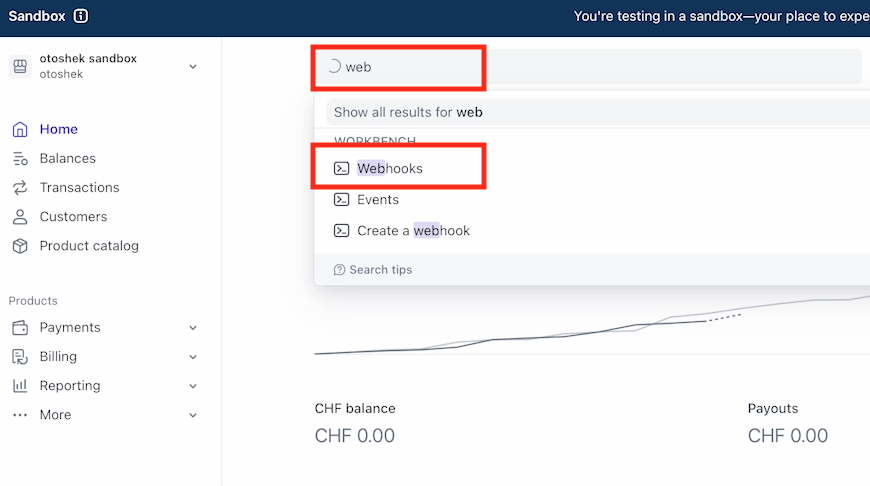
Stripe search bar with 'webhook' search termClick to enlarge ↗ - On the Webhooks page, click the "+ Add destination" button.
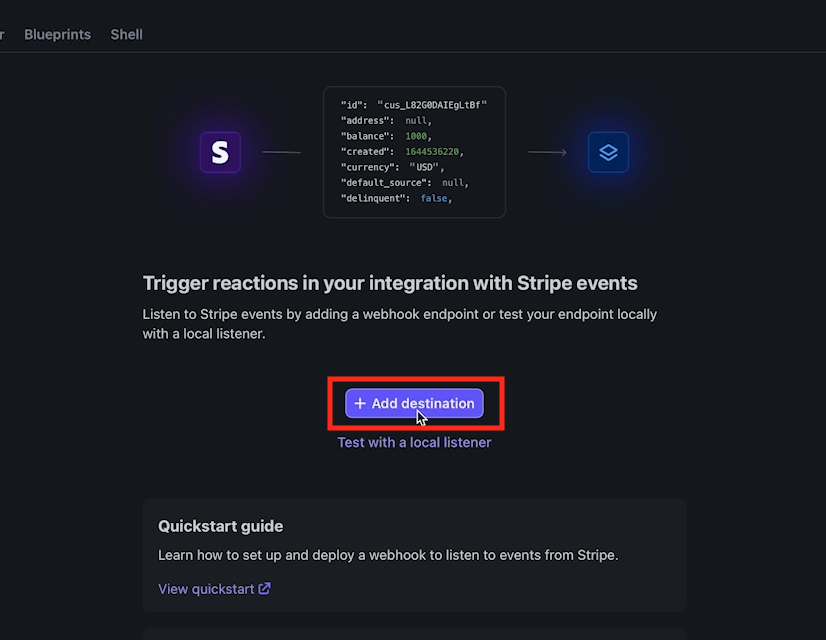
Stripe Webhooks page with 'Add destination' buttonClick to enlarge ↗ - Under "Events from", select Your account.
- In the event selection section, choose the events your application needs. The core set below covers a typical subscription SaaS:
🛒 Checkout
- checkout.session.completed: Confirms when a customer finishes the checkout process.
🧾 Invoice
- invoice.payment_succeeded: Indicates a successful recurring payment.
- invoice.payment_failed: Important for handling missed payments to notify the user.
👥 Customer / Subscription
- customer.subscription.created: Fired when a new subscription is started.
- customer.subscription.updated: Catches updates like plan changes or status transitions.
- customer.subscription.deleted: Triggers when a subscription is canceled/ended.
For reference, the generated Otoshek app's automated setup requests a wider set of 18 events, adding payment-method and subscription-schedule events on top of the core set above. The full catalog is documented in the billing infrastructure deep dive.
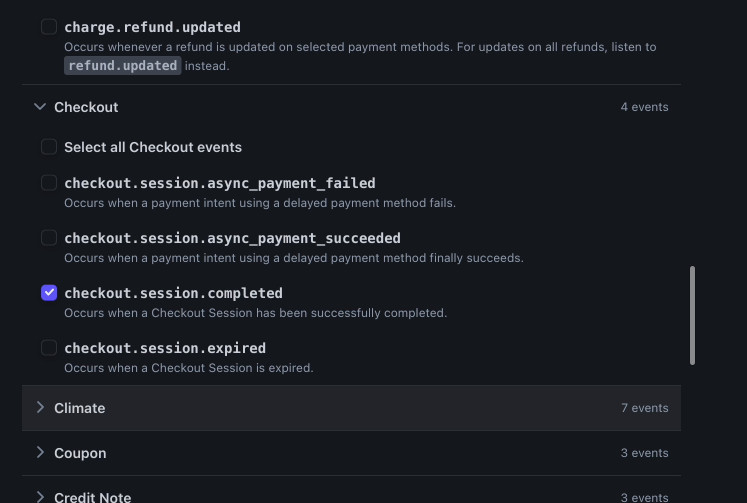
Stripe 'Select events to send' modal with recommended events checkedClick to enlarge ↗ - After selecting the events, click "Continue →".
- In the "Destination type" page, select "Webhook endpoint" and click "Continue →".
- In the "Configure destination" page, fill in the "Endpoint URL" field with the webhook URL your backend exposes, then click the "Create destination" button. In the generated Otoshek app this is the dj-stripe route
https://yourdomain.com/stripe/webhook/<endpoint-uuid>/— but that endpoint is created automatically at deployment, so you would only enter it here for a non-Otoshek project.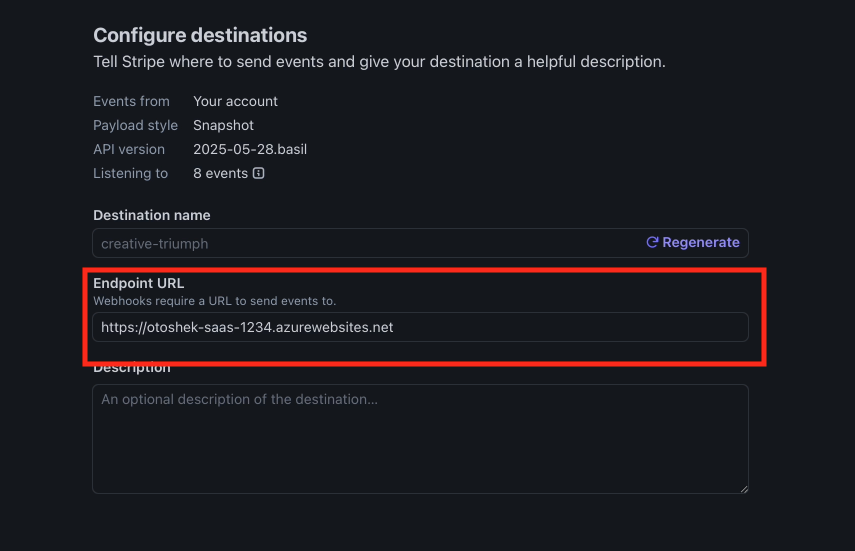
Stripe 'Configure destination' page with Endpoint URL fieldClick to enlarge ↗ - On the event destination page, locate the webhook secret in the right-hand panel under the "Signing secret" section. The key will begin with
whsec_followed by a hidden value. Click the eye icon to reveal the complete signing secret.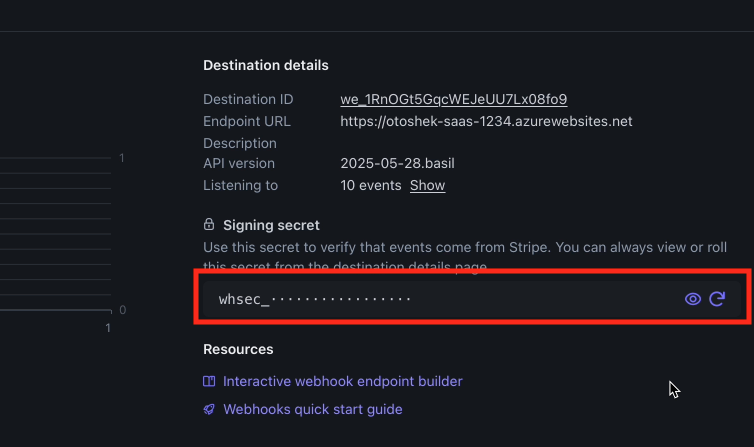
Stripe event destination page showing 'Signing secret' section with eye iconClick to enlarge ↗ - Copy this signing secret and save it. This is your webhook key.