
Supabase Postgres Setup Guide
Walkthrough
1:44Video Walkthrough (1:44)

If you have not downloaded your deployment variables file yet, this is a good time to do it.
Choose Azure or GCP below. In this platform, you can either enter variables manually, one card and one field at a time, or use bulk mode. In bulk mode, you fill this template as you go and later paste everything into one textarea, and the platform will sort and validate the variables for you.
If you prefer, you can also copy the templates directly from the Azure bulk format page or the GCP bulk format page.
Deployment target
This guide will walk you through creating a free Postgres database using Supabase. Follow the video or the written instructions below to get your database credentials.
Create Your Supabase Organization
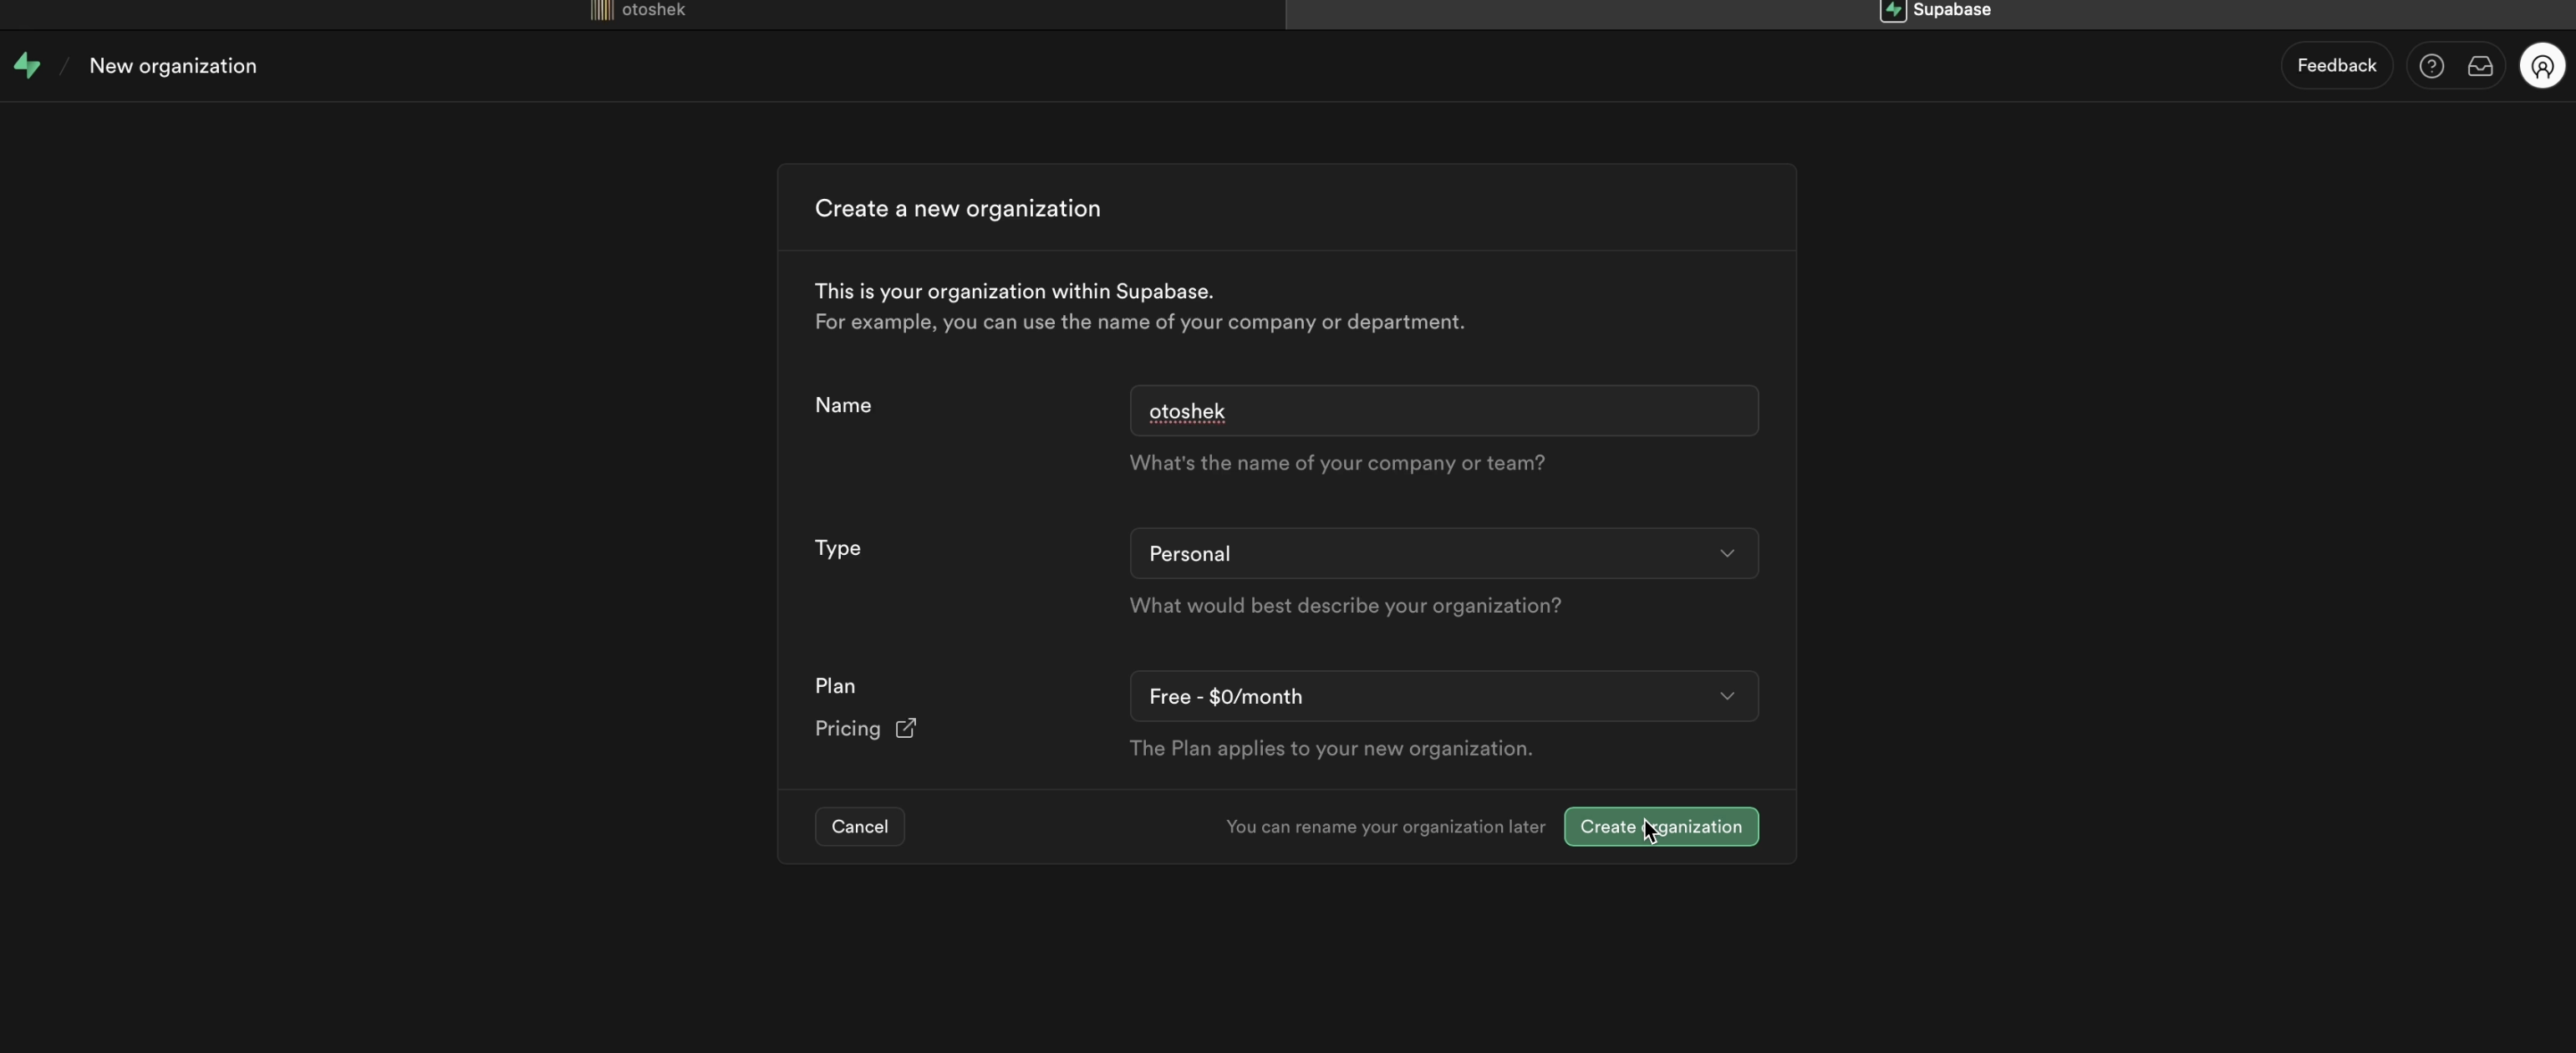
STEP 01After signing up for Supabase, you'll land on a page to create a new organization.
- Enter a name for your organization.
- Keep the type as 'Personal' to stay on the free plan.
- Click 'Create Organization'.
Create a New Project & Save the Password
STEP 02Next, it's time to create the project which will contain your database.
- Give your project a name.
- Pick the region closest to you or your users for the best performance.
- For the database password, you can use the 'Generate a secure one' button.
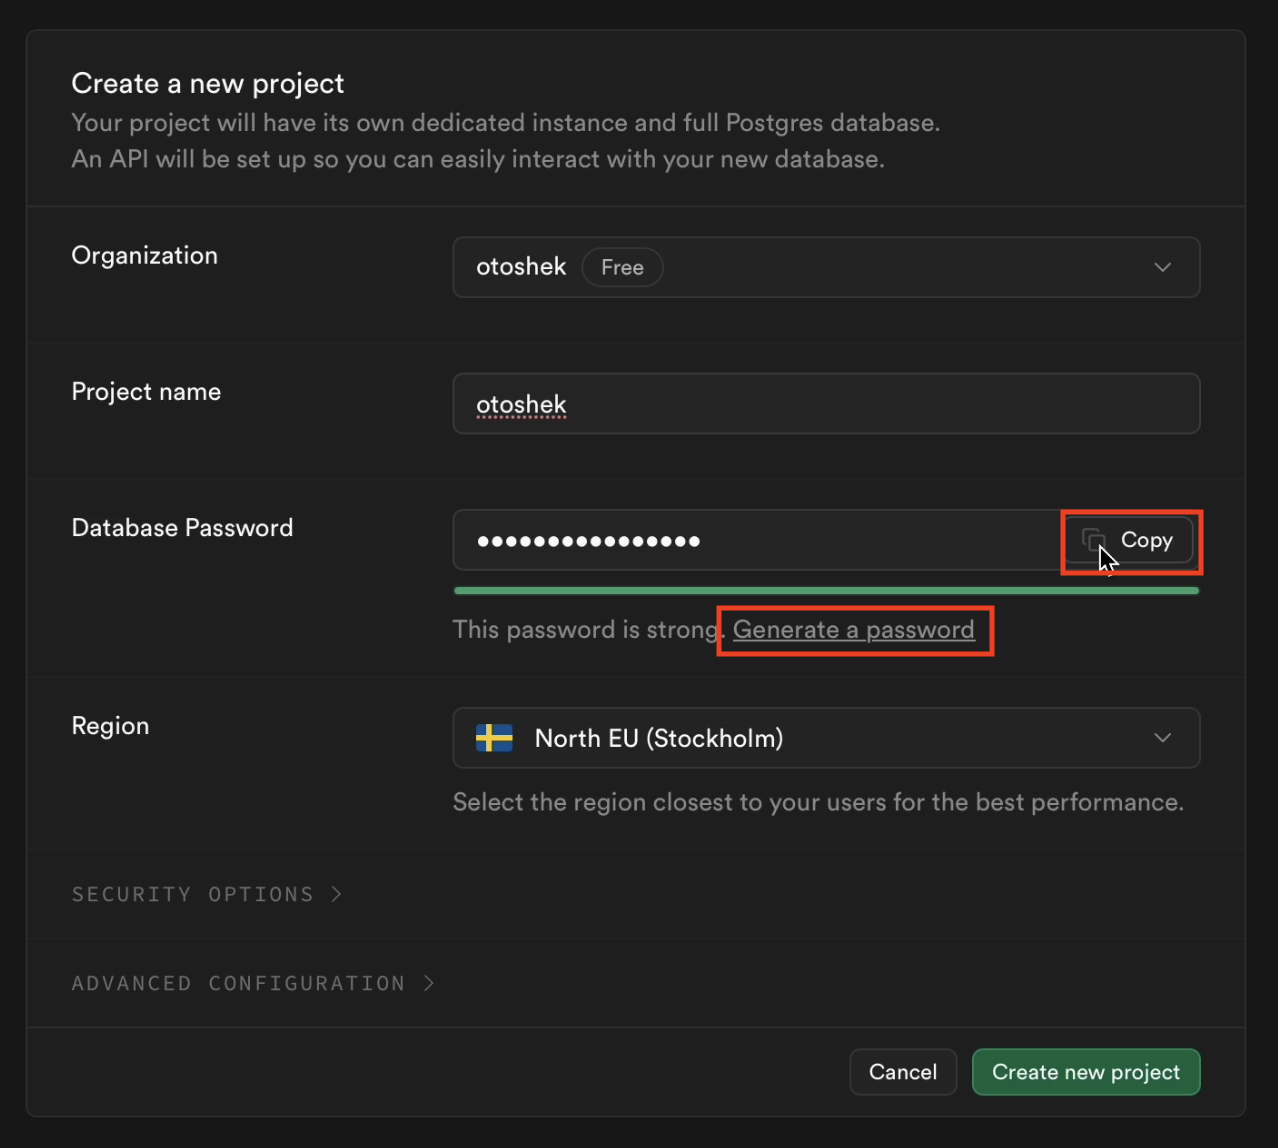
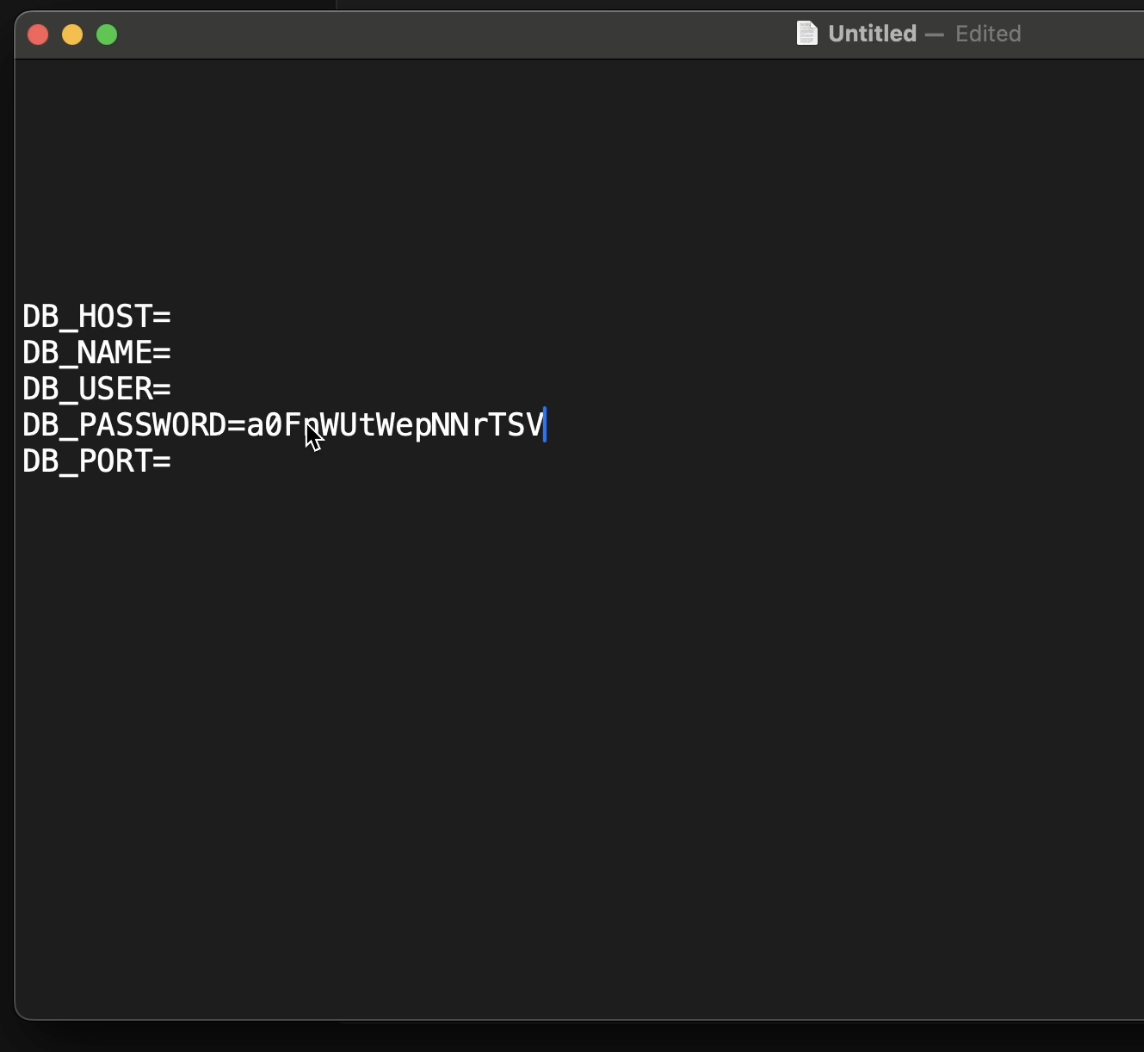
Once you have saved the password, click 'Create new project'.
Find Your Connection Details
STEP 03After your project has been created, you can find the credentials needed to connect to it.
-
In your project dashboard, find and click the 'Connect' button in the sidebar.
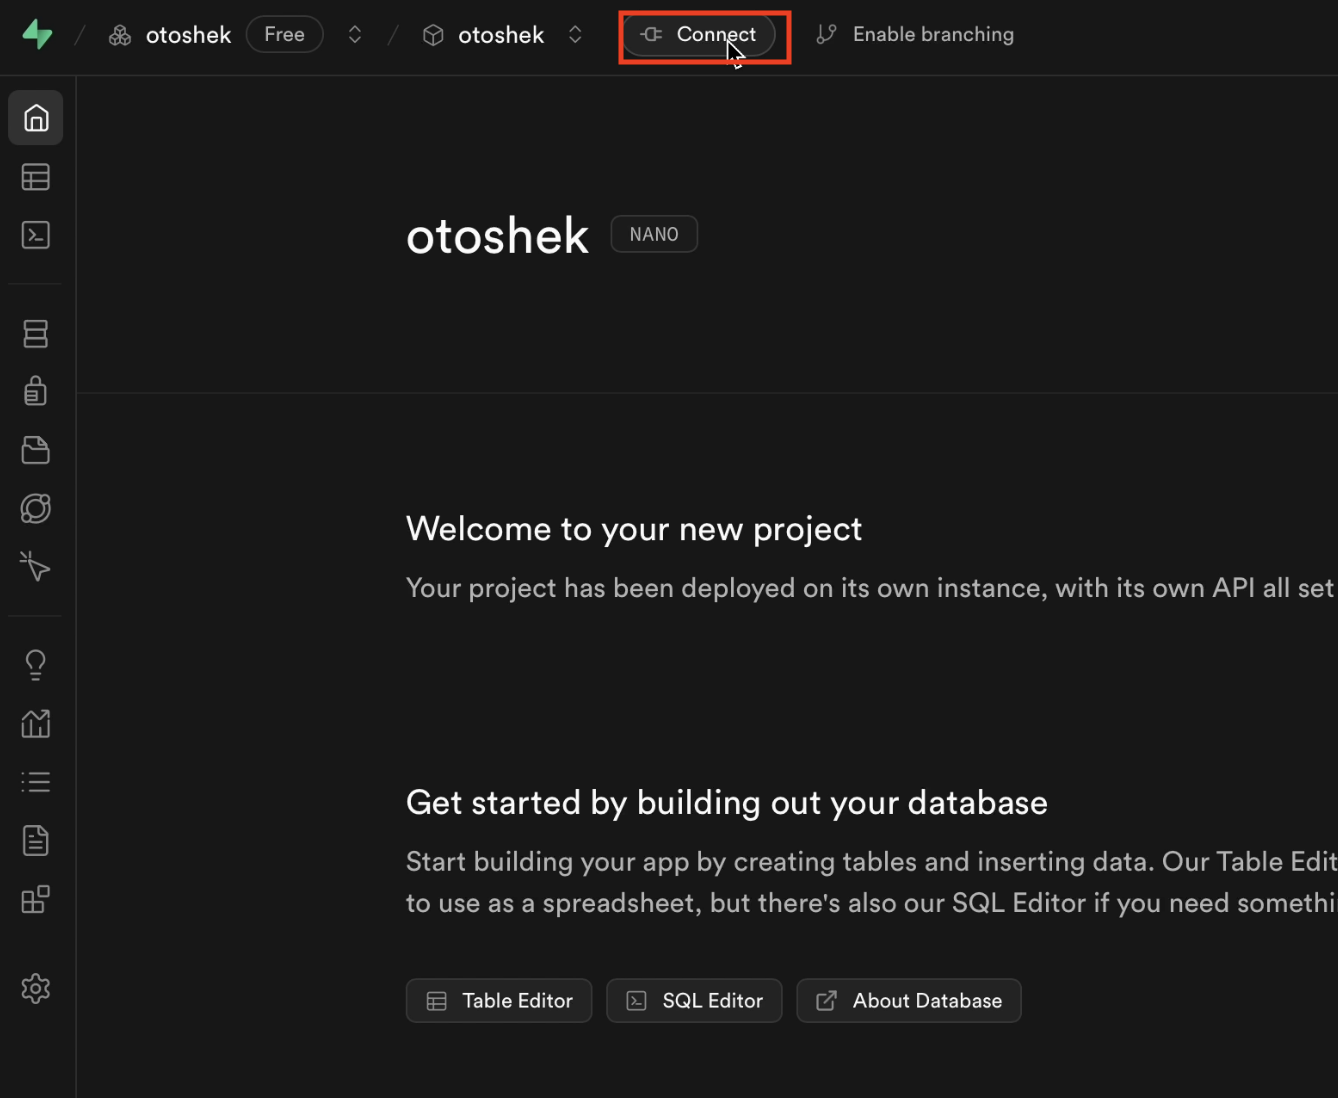
Screenshot highlighting the 'Connect' button in the Supabase project dashboard.Click to enlarge ↗ -
In the 'Connection String' section, click the URI dropdown and select 'Python'.
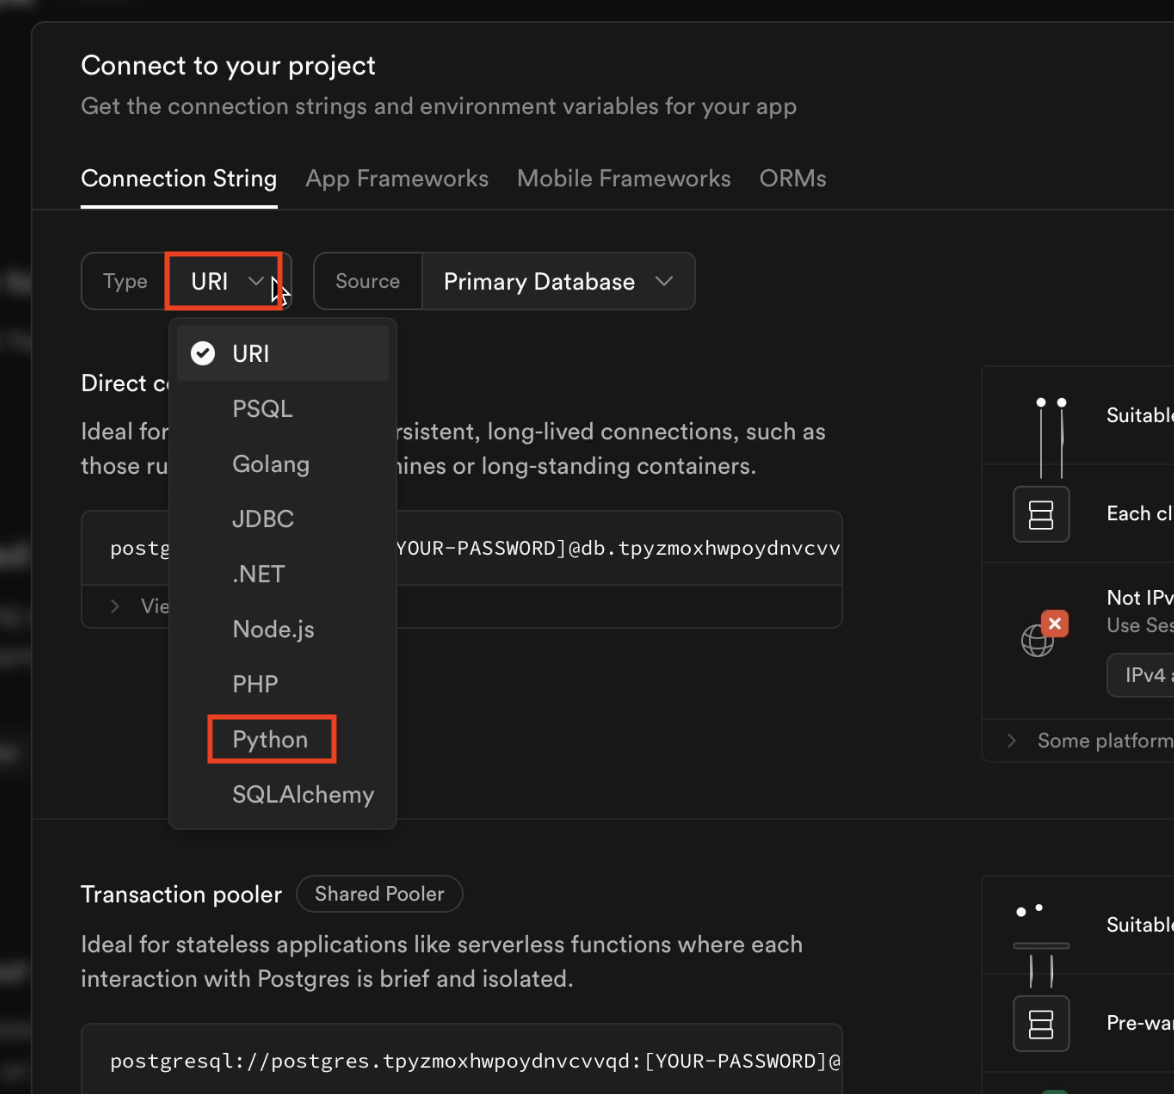
Screenshot showing the dropdown menu with 'Python' selected for the connection string.Click to enlarge ↗ -
Scroll down to the 'Transaction Pooler' area. You can either copy the entire
.envblock or click 'View Variables' to see and copy them one by one.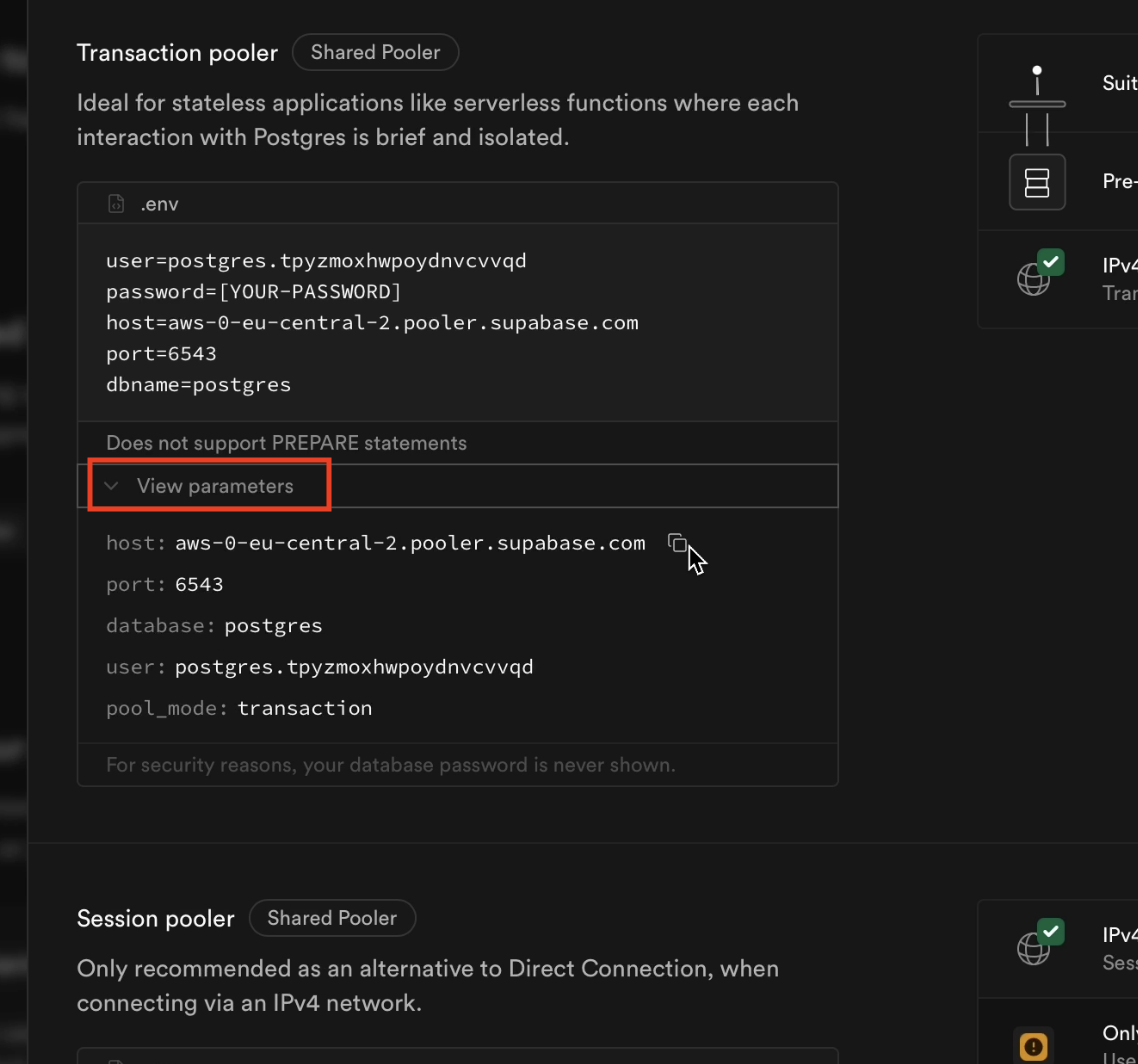
Screenshot of the '.env' section for the Transaction Pooler, showing the variables.Click to enlarge ↗
Credentials ready
HANDOFFYour Database Credentials
These are the values you should have collected. Store them securely.
DB_HOST=<Your database host>DB_PORT=<Your database port>DB_NAME=postgresDB_USER=postgresDB_PASSWORD=<The password you saved in Step 2>
Important: Keep these credentials secure and never commit them to version control.