This video is a demo of what is described on the page. It walks through how to set up Mailjet for your Otoshek project and generate the necessary API keys.
Markdown is preferred, but you can download a plain text version too.
If you have not downloaded your deployment variables file yet, this is a good time to do it.
Choose Azure or GCP below. In this platform, you can either enter variables manually, one card and one field at a time, or use bulk mode. In bulk mode, you fill this template as you go and later paste everything into one textarea, and the platform will sort and validate the variables for you.
This tutorial will guide you through finding the necessary credentials to integrate Mailjet for sending emails, such as for authentication workflows or a contact form.
First, sign up for a free Mailjet account, validate your email, and select the free plan when prompted. Once you're logged into your dashboard, you can begin the steps below.
01
Get Your API and Secret Keys
STEP 01
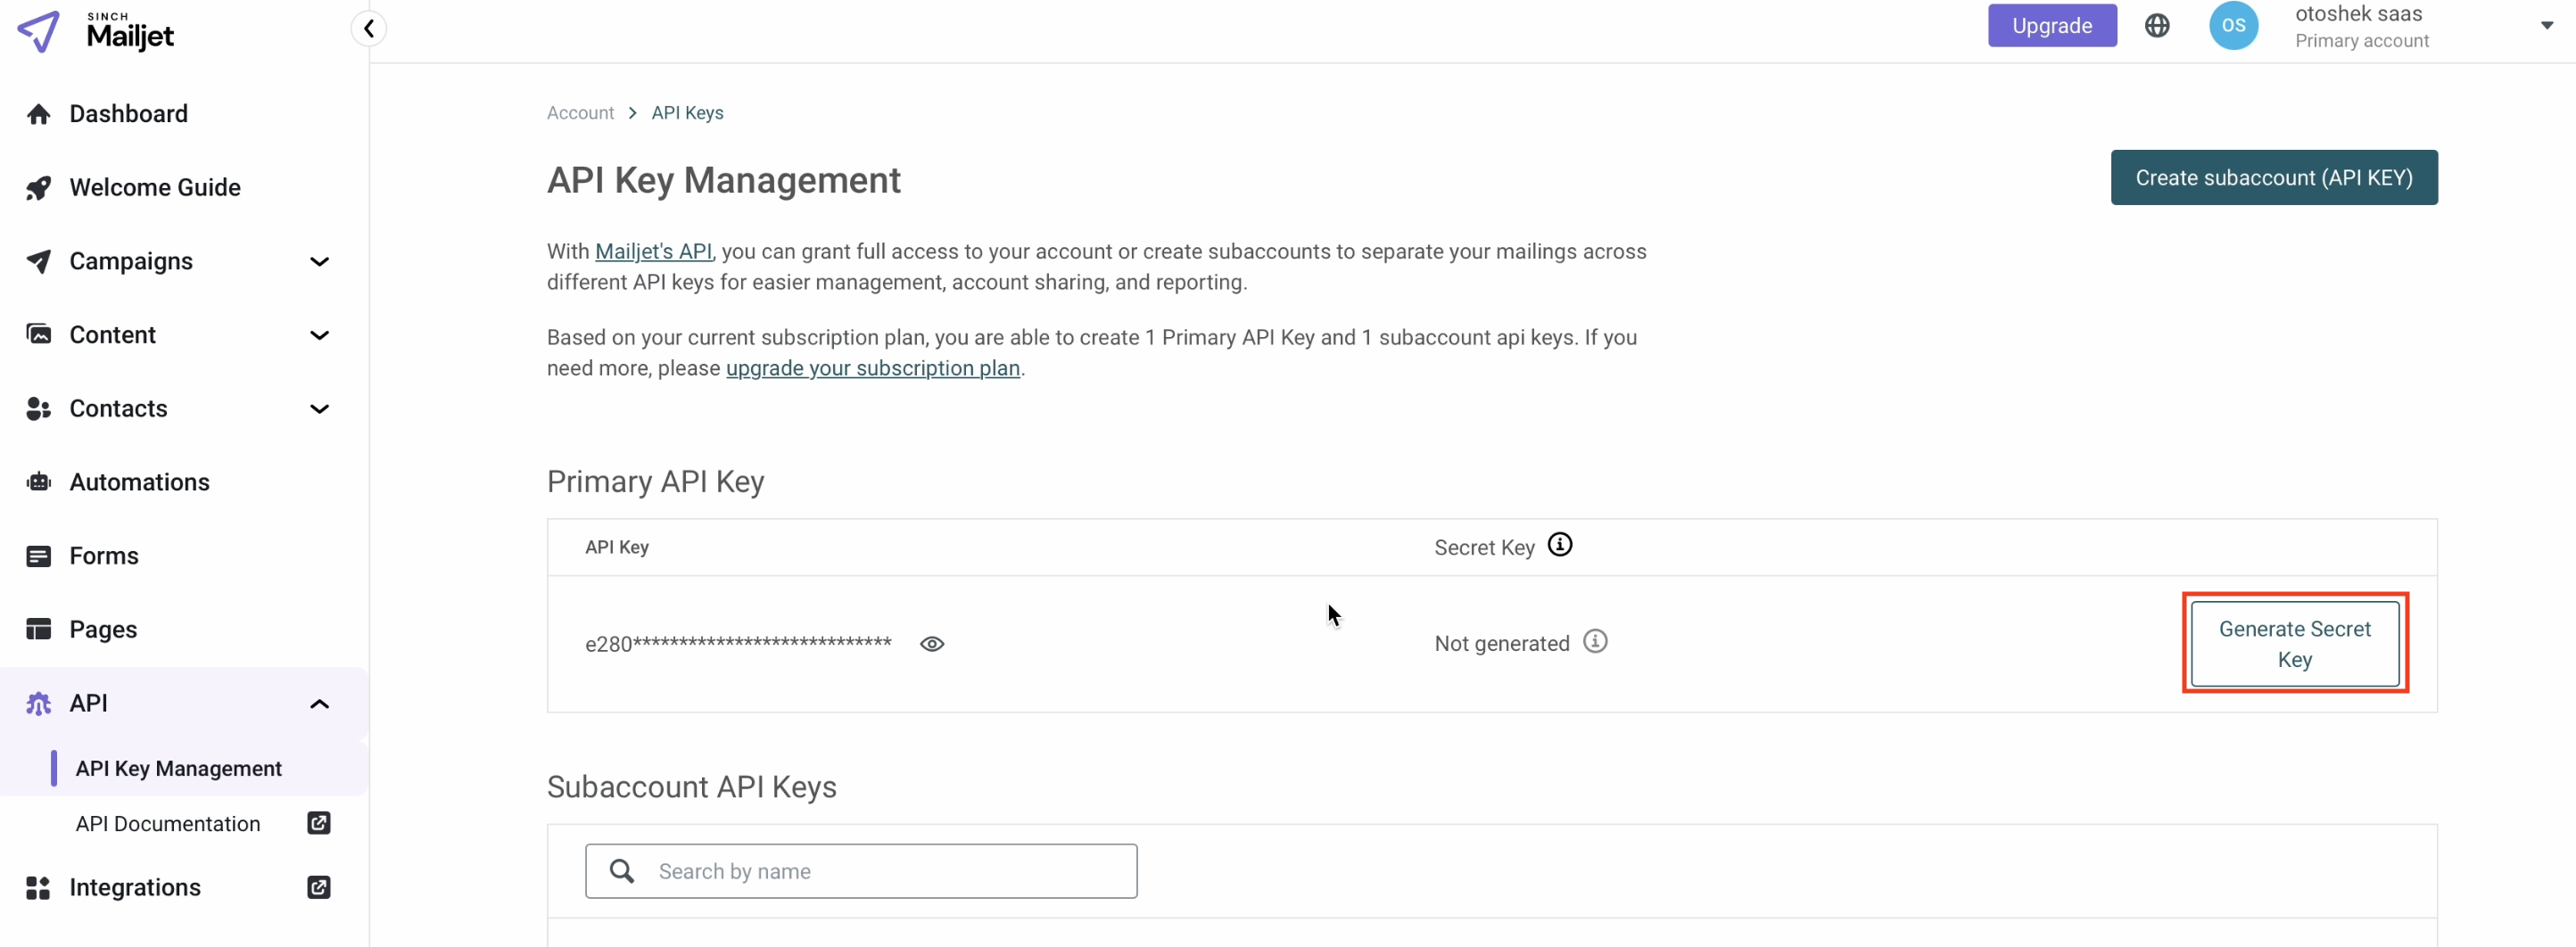
In the left sidebar, click the "API" dropdown menu and select "API key management".
In the "Primary API key" section, click the "Generate Secret key" button on the right.
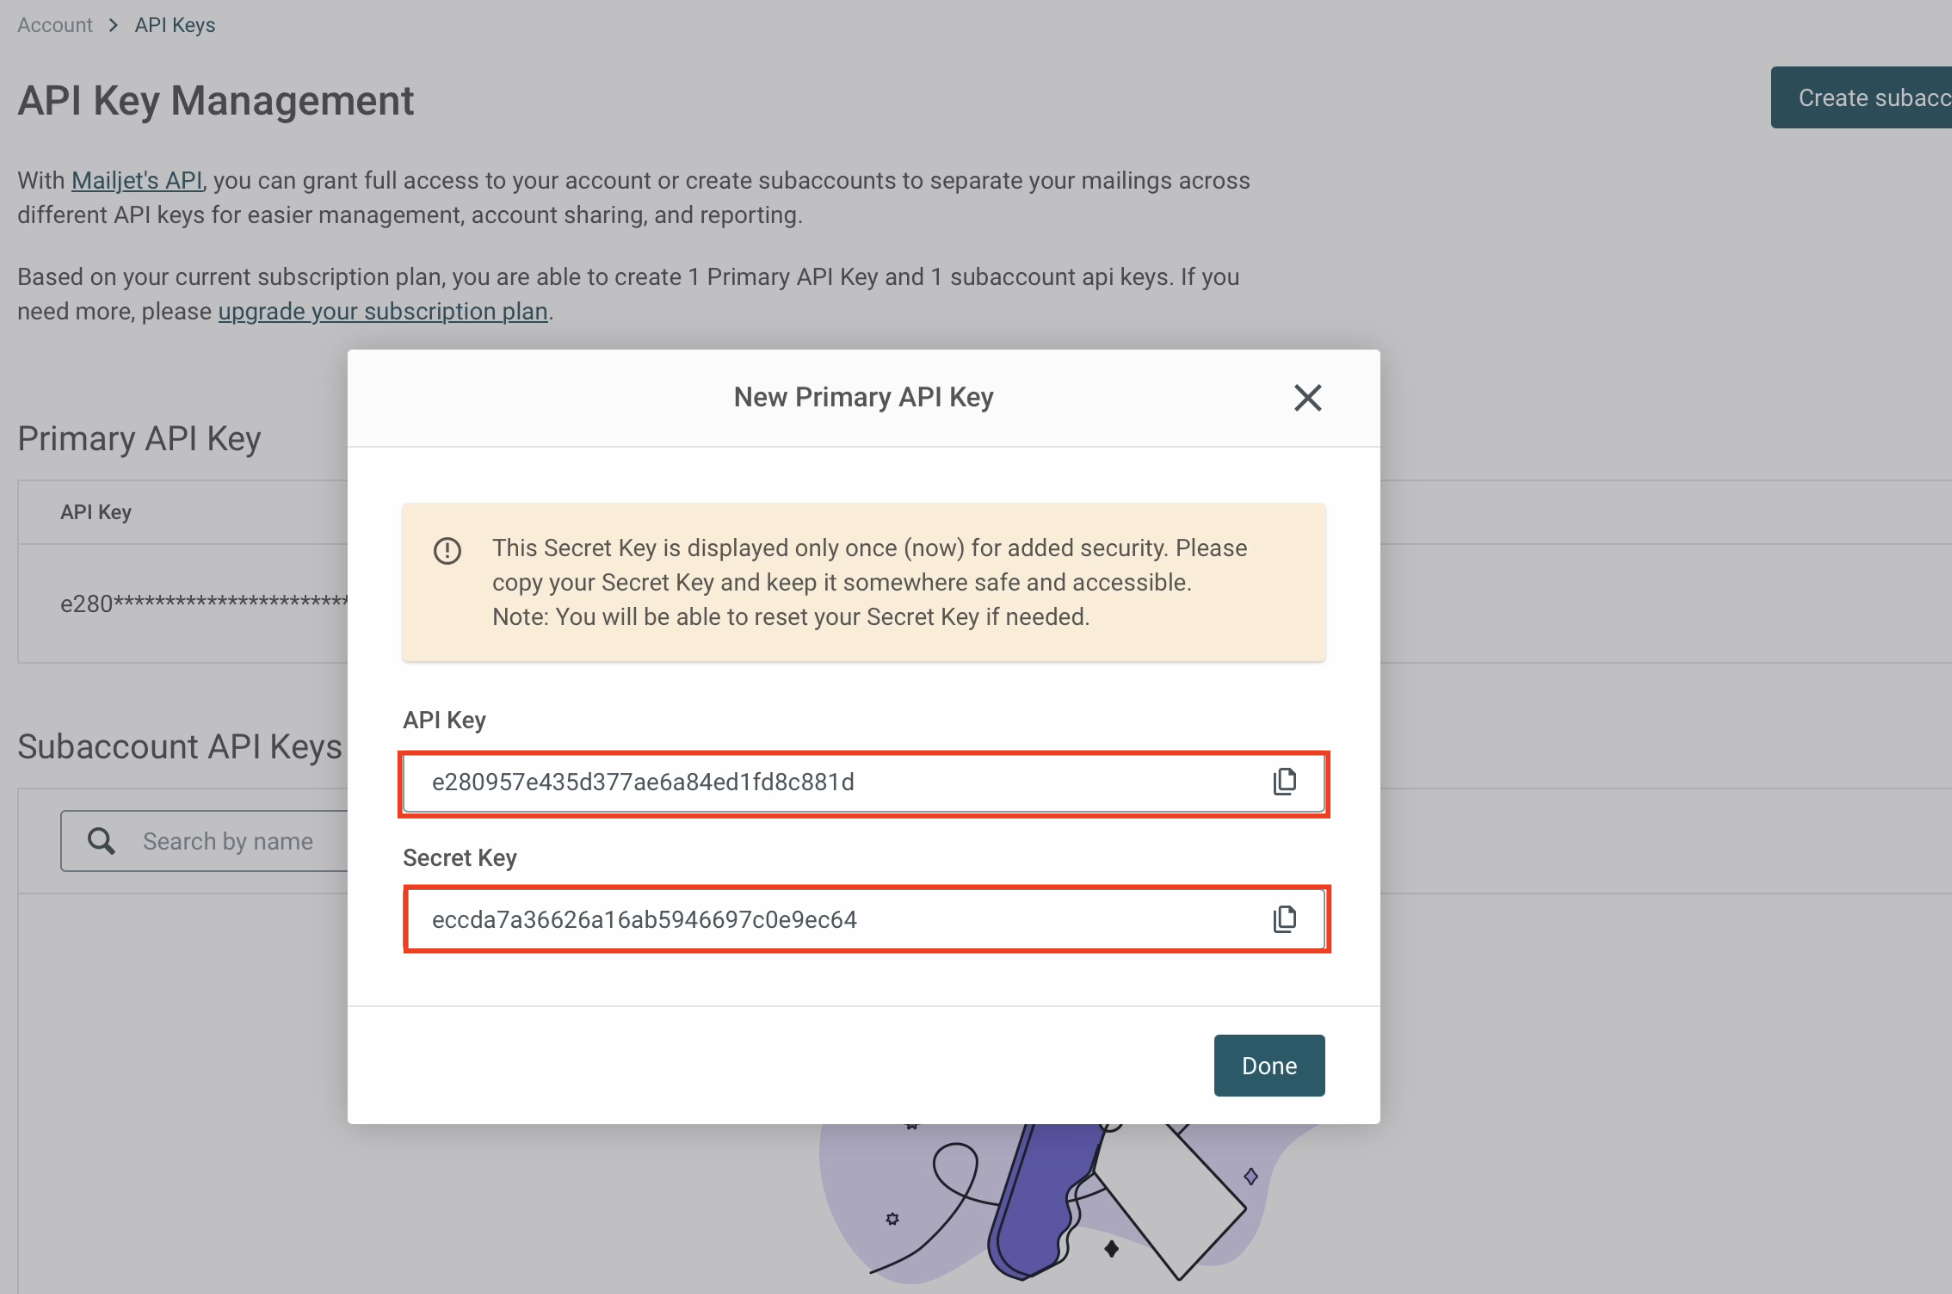
Mailjet API key management pageClick to enlarge ↗A popup will appear showing your API Key (Public Key) and Secret Key (Private Key).
Mailjet API keys popupClick to enlarge ↗
Once you have saved your keys, click "Done".
02
Get Your Default Sender Email
STEP 02
In the top-right corner, click on your account name and select "Account settings".
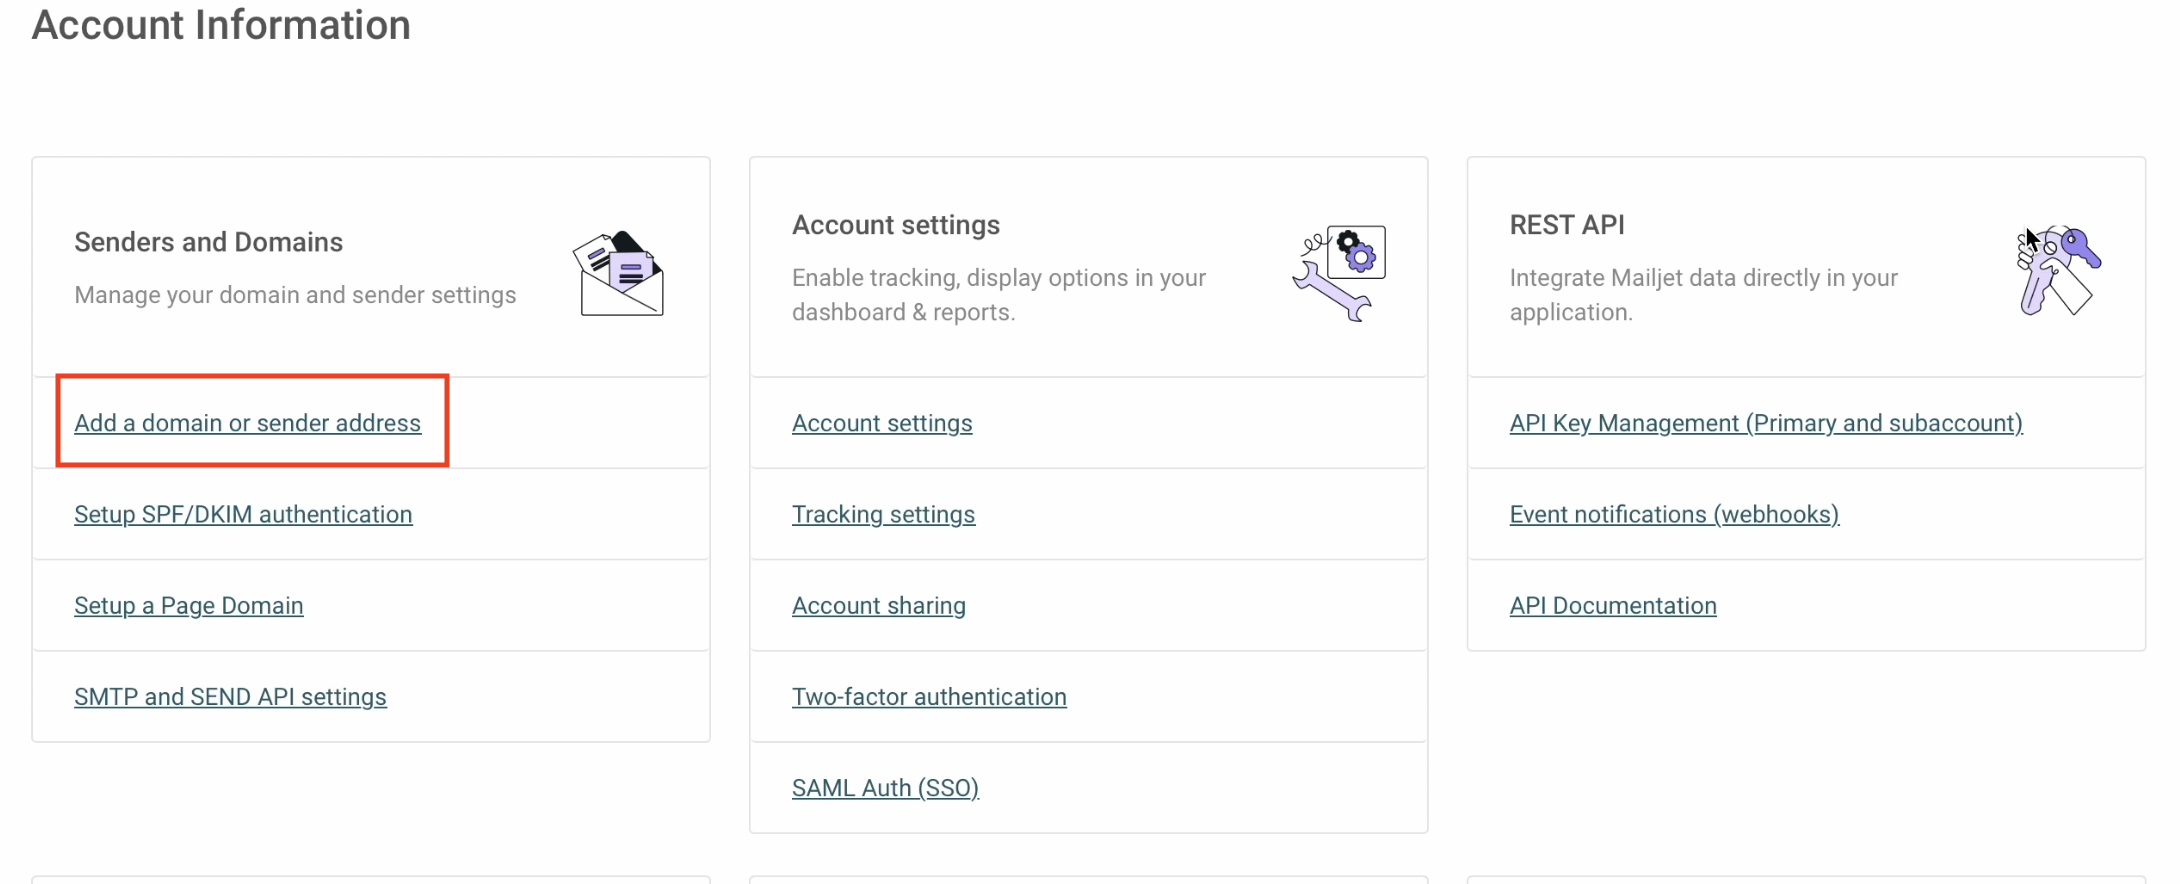
In the "Senders and Domains" section, click on "Add a domain or sender address".Mailjet add domain or sender addressClick to enlarge ↗
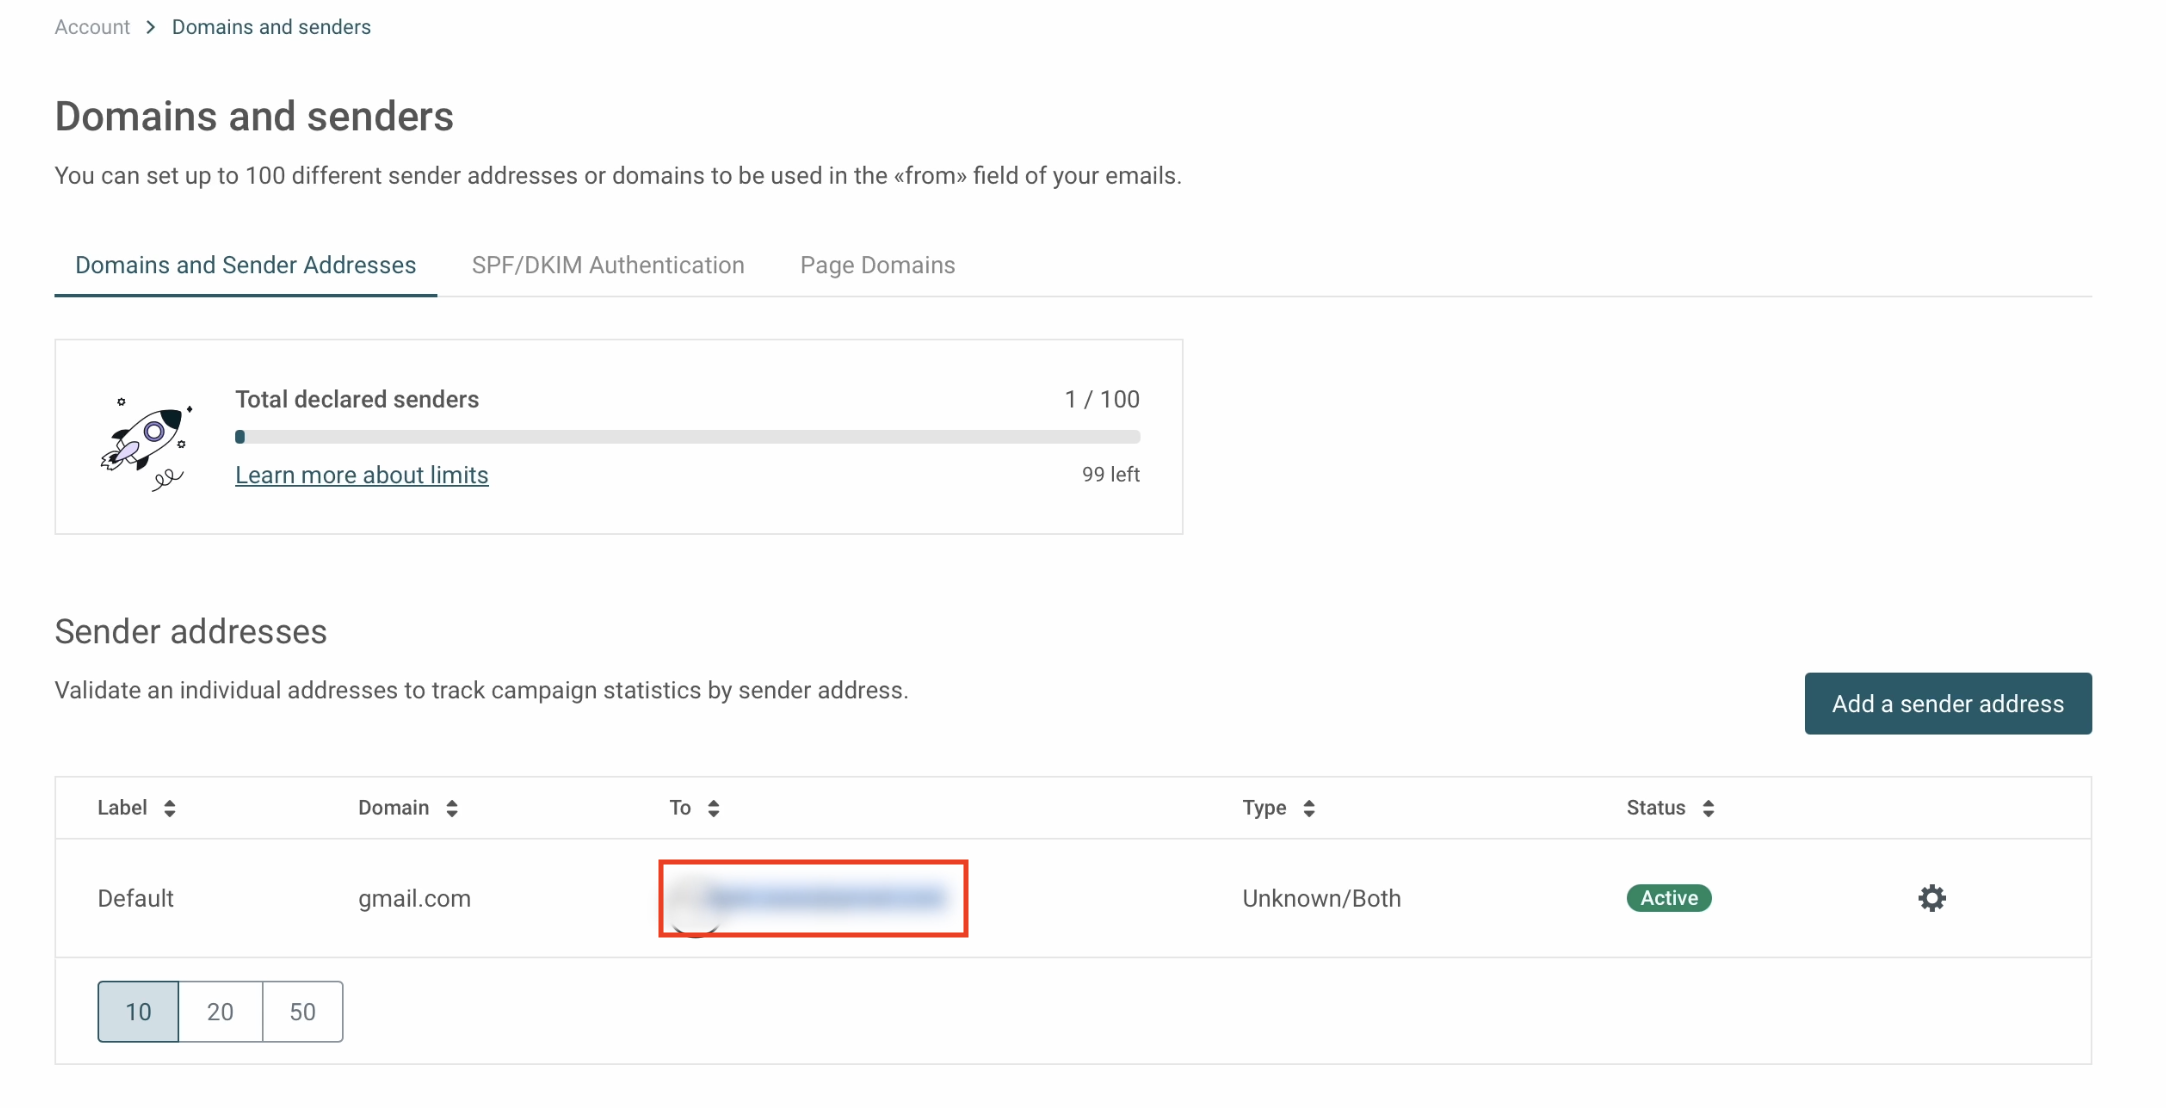
Under the "Sender addresses" section, you can copy the default email address that was created during signup.
Alternatively, you can add a new, more convenient sender address here. This will be the "from" address for emails sent by your application.
Mailjet default sender emailClick to enlarge ↗
03
Find the API URL
STEP 03
In the left sidebar, click the "API" dropdown again, but this time select "API Documentation".
A new browser tab will open. In the left panel of the documentation, select "Send API v3.1".
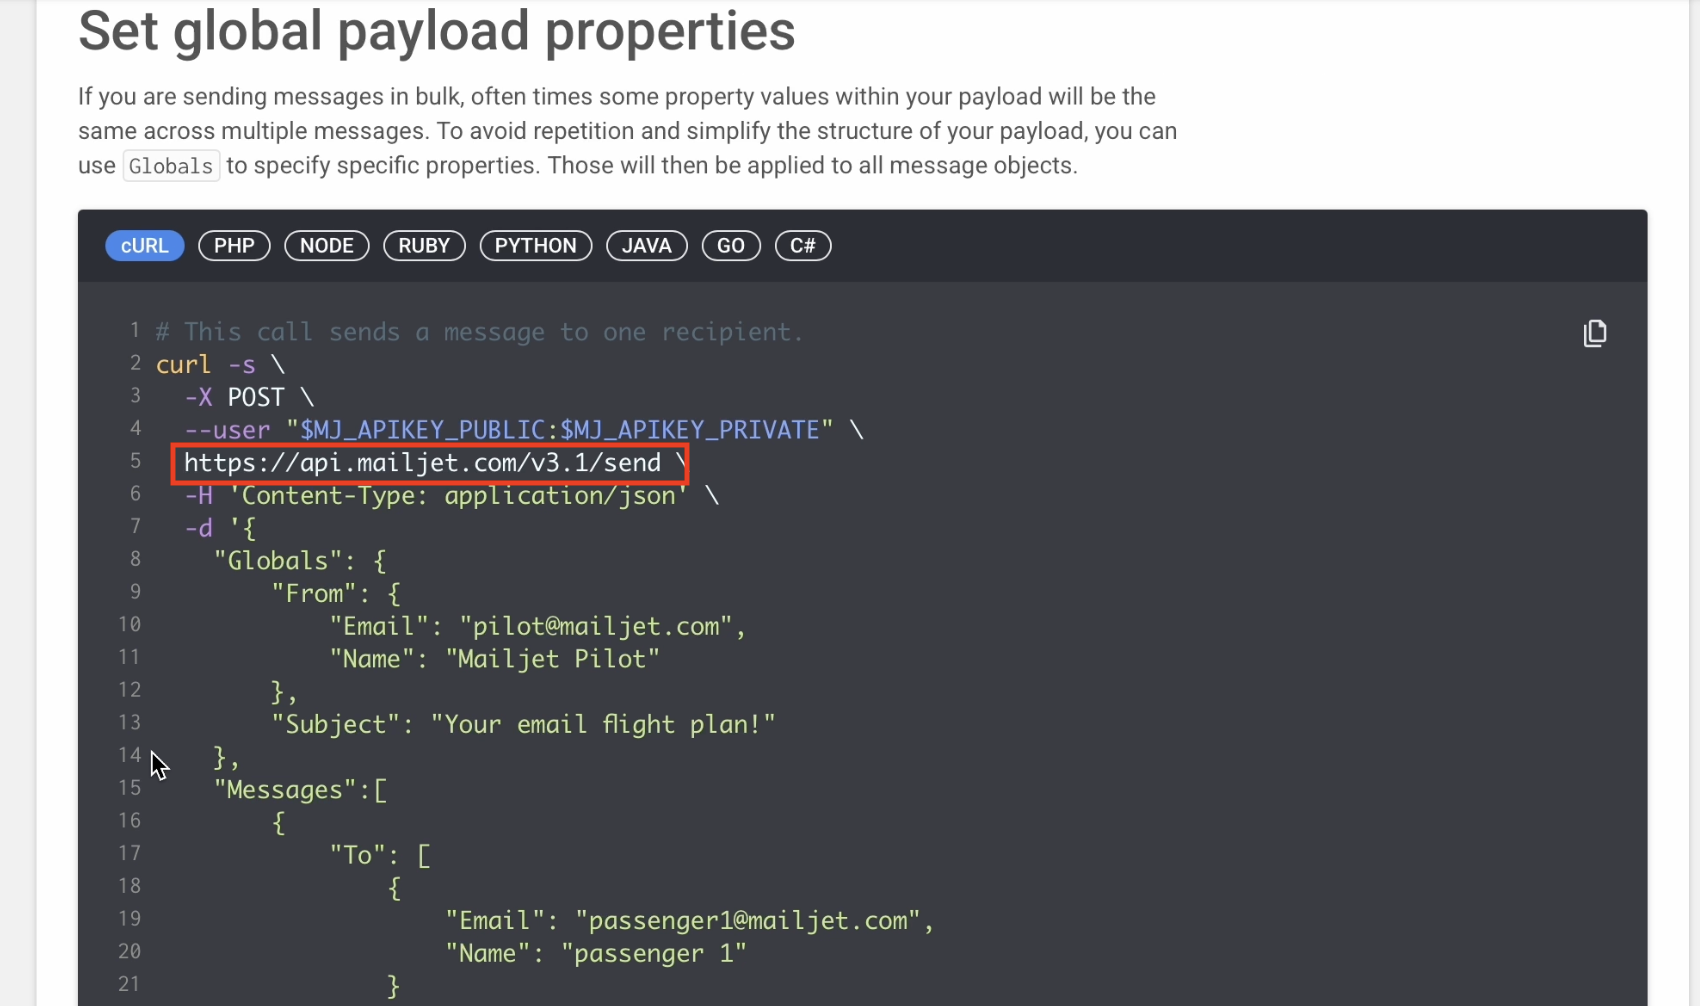
Scroll down until you see the "Set Global payload properties" code example. The URL used in the example is what you need.Mailjet API documentation with URLClick to enlarge ↗
Copy the base URL, including the version number and the trailing slash, but without the /send endpoint. It should be: https://api.mailjet.com/v3.1/
🎉 Credentials ready
HANDOFF
Your Mailjet Credentials
These are the values you should have collected. Store them securely in your project's environment variables.
We use cookies to measure visits.We use cookies and similar technologies to enhance your experience, analyze website traffic, and understand where our visitors are coming from. By clicking "Accept All", you consent to our use of cookies. Learn more in ourPrivacy Policy